Pages

Thursday, February 28, 2013

Blueberry Cupcakes w/ Lemon Mascarpone Frosting (★ ★ ★ ☆ ☆)

This past week we were privy to the ultimate in Hollywood glamour, sophistication, and artistry.

Or at least, that's what we're promised...and crossing our fingers for.

But whether or not the Avengers received one too many nominations or Seth MacFarlane has a beyond amazing voice and a dirty mouth, I love taking part in this night reserved for the film elite.

The Academy.

The Awards.

The Oscars.
Every year we have a little party.

I say "little" because there's less than ten people.

But trust me, we do not take this day lightly.

There's food.  Trivia.

And my favorite.
Voting.

Each person gets a ballot and casts their vote for the winners.  Whoever predicts the most correctly is bestowed a prize.

Last year it was a box of Girl Scout Thin Mints.  A small token to some, but, man, did it feeeeeeel good!

Every year, the competition gets more intense.
By now, we've all added "pre-Oscar research" to our list of things to do before the big day.
Weighing five opinions per category is totally reasonable, right? 

But the best part of this years show -- we'll go ahead and leave Seth MacFarlane, in a suit (weakness #1), singing in the vein of Ol' Blue Eyes (weakness #2), out the equation -- the best was this dress and Jennifer Lawrence.

All of her.
She's a Hollywood experiment.

Like somebody thought it would be a hoot to throw in a completely normal, exceedingly awkward, yet surprisingly talented girl into the mess that is fame, fortune, and Jack Nicholson.

I mean, how totally relatable is she?!?  Am I right?

No other actress I know of is so starstruck by every celebrity she meets, freely brings up her "hyperactive" bladder, and spews any off-the-wall comment that comes into her pretty little head.

So when she tripped on that first stair on her way to accept her award, I just chuckled to myself, "Oh. That's so Jenn!"

Like we're buddies or something.
Only, we're not.
But we totally could be!
So to celebrate this great achievement of hers (and those of many others), I made these cupcakes.

Because nothing says "Wow, you were outstanding in that movie!  When you cried, there was snot -- and in that moment, you were unattractive.  Clearly your dedication was above all else this year" like a rustic looking blueberry and lemon mascarpone cupcake. 

So maybe I won't be winning "Best Train of Thought" or "Best Appropriately Themed Cupcake."

But that's okay.  Because everyone loved them.

The cupcakes were so dense and moist.
And the frosting was the perfect blend of cream, lemon, and sweetness.

Perfect enough to help hide the fact that I forgot half of the sugar in the cupcakes when I doubled the recipe.  

Twice. the. amount. means. twice. the. sugar.

Classic Nat!
Blueberry Cupcakes
adapted from Sallys Baking Addiction

  • 3 Cups Flour
  • 1 tsp Baking Powder
  • 1/2 tsp Baking Soda
  • 1 tsp Salt
  • 2 Cups Sugar
  • 1 Cup (2 sticks) Unsalted Butter, melted
  • 2 Eggs
  • 1/2 Cup Plain Greek Yogurt
  • 1 1/2 Cup Milk
  • 4 tsp Vanilla Extract
  • 1 Package of Freeze Dried Blueberries (1.2 oz or 1/4 Cup Ground)


Lemon Mascarpone Frosting
adapted from Week of Menus

  • 4 Tbsp (1/2 Stick) of Butter, softened
  • 8oz Mascarpone Cheese
  • 2 1/2 Cups Powdered Sugar 
  • Zest of 1 Lemon
  • (Optional) Additional Lemon Juice to Taste


Makes Approx. 24 Cupcakes
Preheat Oven to 350F
1) In a medium bowl, combine flour, baking powder, baking soda, and salt.  Mix and set aside.
2) In a large microwave safe bowl, melt the butter.  Heat in 30 second increments.
    Note: If you don't have unsalted butter, that's okay.  Just omit the added teaspoon of salt listed in 
              the recipe. 
3) Add sugar to the melted butter and stir until sugar starts to dissolve.  The mixture will still be very 
    grainy.  Place bowl in refrigerator for 1 minute. 
4) Take butter/sugar bowl out of the fridge and add the remaining wet ingredients one at a time, beating 
     in between each addition - eggs, yogurt, milk, and vanilla.

5) Add the dry ingredients to the batter in small increments until well combined.
6) In a food processor (or coffee grinder) grind the freeze dried blueberries until almost a fine powder.
7) Add ground blueberries to batter and beat/stir well.
8) Line a muffin tin with cupcake liners and fill each to about 3/4 full.  
9) Bake at 350F for approx. 20 minutes or until a toothpick, inserted into the center, comes out clean.  
    Allow these to cool completely before frosting. 
10) For Frosting: Beat together softened butter and mascarpone cheese.  Mixture should be fluffy.
11) Add lemon zest and sugar, one cup at a time.  For stiffer frosting, add more sugar.  
If Jenn gets to win, then why can't I?
Clearly I'm not above self promotion, people.


*Special thanks to my sister for being obnoxiously photo happy, yet very helpful in snapping away at me baking this week.  One less day to have to worry about getting flour and butter caked into my lens.


Thursday, February 21, 2013

"Birthday Cake" Seven Layer Bars (★ ★ ★ ☆ ☆)

No, this picture isn't dangerous.

Okay, ...it is a little bit.

Okay, I kind of freaked out that the whole thing would tumble over and my lovely light box would burst into flames.

But how else was I supposed to create such a "subtle" foreshadowing?
Anything for art, right?

---------

So besides the November-to-December holiday montage, February is my favorite time of year.

No, not because it's Valentines Day.

Although, I do like the whole "chocolate" binge aspect.

And I'm sure the whole "love" aspect is swell too, but I've had a total of two valentines dates throughout my entire existence so the ratio of Dates on V-day to Not Dates on V-day is none too inspiring.

And it's not even because February is the only month that never reaches thirty days...although, I have to admit that is pretty cool.

Nope those aren't the reasons.

February is my favorite time of year...
...BECAUSE IT'S MY BIRTHDAY!


And this year, I'm closer to thirty than I've ever been.  

So I'm celebrating
...all month long. 
Because I deserve it.

To help you join in on all the festivity and help you get to know me a little better, I thought it'd be fun to answer a few questions about myself.  

The more you know, the more you care, right?       RIGHT?!         right?


Don't blame me for these questions. 
If this is what Google says the world wants to know, then who I am to argue?
I mean, it's Google.  

So without further ado...  (be glad I whittled these down from my original "twenty-six" question idea!)

1. What is your favorite time of the day? 
    Pretty much the parts of the day where my stomach starts to grumble.  Because then it's "sanctioned"  
    chow time!

2. What are you absolutely best at?
    Answering questions about myself!  I'm the best in the world...in the universe!!

3.  If you were a book, which book would you be?
    A book with lots of short chapters.  I hate chapters that go on a hundred pages strong.

4.  Do you know how many pieces of clothing you own?
    The amount where a "one in, one out" rule has become a necessary evil.   

5.  Which song would you rather wake up to in the morning?
     Let's get real, it's Freddie Mercury's..."We are the Champions."  Try not getting pumped to that. 

6.  Aside from Ricky Martin, which artist do you listen to the most?  
     Well since I listen to Ricky Martin, um...., never....I'd have to say every artist in the world.  Even 
     Rebecca Black.  Because even I know that "yesterday was Thursday, today is Friday" and we be 
     "partyin' partyin' yeah!"

7.  If you could have dinner with anyone, who would you choose?
     I think I'm going to have to go with Derek Wills on this one.  *Sigh* ...that salt and pepper hair  
     ...that British accent  ...that seductive-one-moment/rip-you-a-new-one-the-next bad boy quality.  I 
     am taken.

8.  What 3 things would you not take with you to an island?
     Really? Most unproductive question. Ever. But obviously I wouldn't bring 
     1) My new Smash DVD's.  Only because there is no electricity...unless this is "The Island" - from 
         Lost.  Then I'd be A-okay. 
     2) Any of the plants from my backyard.  Because, in my imagination, this island is full of trees and
         tropical flowers so my plants would be redundant and outshone in comparison. 
     3) My cat.  As much as I love him, he'd drive me crazy while I was trying to build a "Robinson 
         Family" worthy treehouse and get an even tan. 

9.  What would you do if you found a wallet and there was no ID in it?
     Bury it.  Honesty prevents me from taking someone's money.  But if I can't have it then neither can 
     you!

10. How different would your life be if you were to live in Africa?
      Pretty different.
Since we're totally close now - I opened up so much! - I feel we can appreciate what happened in my kitchen this past week even more.

Seven Layer Bars.
Birthday Style.

And I'm not talking your normal "seven-layers-actually-translates-to-seven-ingredients" bars - I'm talking

Count em', Seven...


1 - Golden Oreos
2 - Funfetti Cake Batter
3 - Marshmallows
4 - White Chocolate
5 - Semi-sweet Chocolate
6 - Coconut
7 - Sprinkles


....Layers.

Sticky Sweetness.


Birthday Cake Seven Layer Bars
Inspired by The Domestic Rebel

  • 1 Cup of Golden Oreos, Crushed with Cream Removed
  • 3/4 Cup Butter (1 1/2 Sticks), Divided
  • 1 Box Funfetti Cake Mix
  • 1 Egg
  • 3/4 Cup Marshmallows
  • 1/2 Cup White Chocolate Chips
  • 1/2 Cup Semi-Sweet Chocolate Chips
  • 1 Cup Flaked Coconut
  • 1 - 14 oz Can of Sweetened Condensed Milk
  • 1/3 Cup Multicolored Sprinkles

Needed a 9x13in pan
Preheat oven to 350F Degrees
Makes Approx. 20 Bars

1) Gather all the ingredients together.  These bars are easy, but there are a few steps because of all the
    different layers.


2) Separate Oreo cookies from the creams.  I bought the Birthday Cake variety, but once you remove 
    the cream there isn't much difference between these and the standard Golden.  
3) Finely crush the Oreo cookies until you get a cups worth of crumbs.  This is about 3/4 the package.  
    Start with a meat tenderizer or a Ziploc bag and your hand to make the crumbs.  If you need them 
    finer place into a food processor or, if you are lazy like me, a cleaned coffee grinder. 
4) Place 1/2 stick of butter (1/4 cup) into the bottom of a 9x13in pan.  Let it melt in the oven.  
5) Add Oreo crumbs on top of the melted butter and pat down gently.

6) In a medium bowl, combine funfetti cake mix, egg, and rest of the butter (melted).  
7) Take pieces of batter, flatten them in your hand and add to oreo cookie base.  Make sure the entire 
    bottom layer is covered.  Add these gently as you don't want to disrupt the crumb crust.
8) Bake in the oven for 10 minutes.
9) Carefully remove slightly baked cake/oreo layers and add marshmallows.


10) Add white chocolate chips, semi-sweet chocolate chips, and cocount. 
11) Pour can of sweetened condensed milk over the entire thing.  Make sure everything gets covered. If    
      you can do with less than a can then stop there.  The less you have to use the better.  It's really, 
      very sweet.
12) Disperse sprinkles across the top. 
13) Bake for 15-20 minutes, until the top begins to get golden and bubbly.  Remove from oven and 
      cool completely on a cooling rack before cutting into pieces.  

Happy Birthday to me!


----------------------

Oh my goodness!  Thanks so much for viewing.  These were featured during The Back For Seconds Link Social on March 5, 2013 and Blooms Designs Link Party on March 6, 2013.  Click the icons to check it out!!!


Also featured on:


Thursday, February 14, 2013

Behind The Blog: Facebook Page


I'll admit it.

There have been times when I've hated this blog.

Resented its drain on my time.  

Planning, writing, deadlines.  Week after week.  

What is this college?!  

Sometimes I'm inspired and utter brilliance flows from the moment I begin.  
In that case, it's fun. I mean who doesn't love being brilliant?

But other times it is like pulling teeth.

But I have never...ever...missed my "blogging" times more, than I do at this moment.

You see.  It's really hard to bake, be creative, or just have two minutes to yourself when you are in the middle of a huge project at work on top of covering someone else's full time position.  

This is my life:
I get up.  And I go to work.  
I come home.  ...And I work.  
It's the weekend.  .......And I work some more.   

I need ME time.  I need BLOG time!  Blog, I misssss youuuuu!!!!!!!!!

It's funny how quickly a perspective can change.  It's all about what you set your focus on.

I was thinking about that a couple of days ago.

I mean I had a pretty terrible day.  By anyone's standards.  But then I remembered all the "little" nice things that happened, and a light went on in my noggin.  What we choose to dwell on dictates how we feel.

Forthcoming: Proof.
A real life example from a few days ago. 

Feel free to block one side or the other of your screen to get the full effect.


See there's a pretty great day in there amongst all that other mess.

So whether it's a "hate" blog or "love" blog moment, I know that in the end I really enjoy what I do.

Especially, in these moments of complete creative deprivation.

Next week, I (*fingers crossed*) will have a real, honest to goodness "baked-good" post for you all.

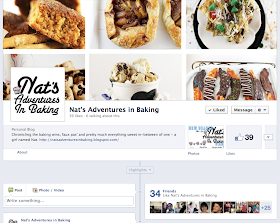
But in the mean time if you need your N.A.I.B. fix, I've set up a Facebook Page!  (Click any of the pictures to be taken there).


Now, you can connect with me outside of this here blog, and I'll be posting interesting baking tidbits a couple of times a week.  

Just to keep all of our minds where they should be.  
...On cake, of course.

Plus, I link all of my posts to the page so now it can show up on your newsfeed every Thursday!
   
So go on, "like" Nat's Adventures In Baking!  I'd love to hear from you!


In the mean time I need a good massage.  
That's a perspective change for ya.
The thought of a random person's hands on my shoulders normally wigs me out.

Now?  
Not so much.


Thursday, February 7, 2013

Behind The Blog: Bloggity Blog Redesign

I don't know why I call this my "Bloggity Blog."

I just do.

Whenever I save a file or photo for this here blog - "bloggity" is usually somewhere in the title.

I guess that's kind of what I do.

Morph proper names like "Nat's Adventures In Baking" into nonsensical non-names.

It's how my cat became:

Booger
Boosh
Boosher
Boo Bear
or Little Bast@#%...oh, that's not a nice one.

I wonder if he knows his name is Archie?


While I have a real food review post coming up soon, I'm pretty busy working for the next couple weeks so I won't have time for a more detailed post until this weekend.

What better time to give you a tour around the new design, huh?


I've been using the "Dynamic" view in Blogger ever since they first introduced it.

For a complete and utter beginner, it's great because it instantly gives your blog a facelift - no brains involved.

However, I always had issues with it looking different on every computer and not being user friendly.  

Finally, after two successful "test" blogs, I got up the guts to switch back to "Simple" view...and viola!  Here we are.

If you ever want to start a blog, I suggest you never, ever go with the Dynamic View - as tempting as it may be.  Your blog layout may suffer for awhile, but you can build in Simple View one step at a time and it's infinitely more customizable.  

So now I introduce to you the new header and even newer - page bar!


Home Tab: Get the goods.  Here's where all the posts happen in a chain of the four most recently added.


Comments Section: At the end of each post.  What made you laugh?  What made you cry?  


About Me: For now it's just background on why I started this blog, but I'll add more to it bit by bit if I feel inspired. 


Recipe Index:  This is my favorite part!  I've wanted to do this forever.  Now you can find the recipe you need, when you need it.  First, I plucked out my favorites - the ones I'd make again - and put them at the top.  The rest are organized by type.  Maybe you'll find something that intrigues you.


Baking Basics: I also set aside a tab for all the baking 101's, the "how to's" if you will.  Once again finding what you need, when you need it.


Fav Blogs: Giving a shout out to the blogs I follow.  The ones that inspire me.  Hopefully you'll find one or two that spark your interest.


And now, for the Sidebar.

On the top half we have:

The Search Bar.  Looking for a recipe that uses graham crackers? Marshmallows?  Type it.  Find it.

The Follow By Email.  Can't remember to check back here every week?  Me either.  Just type in your email address. You'll get a verification email.  Click the link and you're all set.  You won't have to miss out on a post again.

The Popular Posts.  Here's a running log of the top 5 most popular posts.  So you can relive them over and over ...and over.


And the bottom half:

Blog Archive.  All posts listed by date.  Year, then month, then individual post.

Subscribe.  You can add N.A.I.B. to your RSS feed.  If you don't know what that means then you don't have it.  Basically, if you like all of your news, blogs, etc (anything that is regularly updated) all in one place then here you go.

Become a Follower.  Join the club and publicly declare your affiliation with my blog (-gity blog ;).  Every blog offers this, but in all honesty I've never seen any benefit in it, except that it makes me look good. (I'm popular!)

Translate.  In case you have all these international friends who would just love my blog.  Or you want to brush up on your Bulgarian.  It's amazing and scary how many languages you can translate this post into.  Dang, Google.  Taking over the world, one blog at a time. 

--

And that my friends concludes this session of "Nat's Bloggity Blog Tour."

Hope you like it!

And find it a whole lot easier to navigate

...plus a little prettier too.


Friday, February 1, 2013

Double Chocolate Cereal Cookies (★ ★ ★ ☆ ☆)


I don't know that I've ever related to a cookie more.

You see for the past month, I've been doing two people's jobs.  

Worn two (though similar) hats...
Tried to maintain the quality of my work along with the person's that I am covering for...
Dropping one to pick up the other...

And what does it result in?

Adequate performance.
Nothing crumbling to pieces.
Nothing amazingly praiseworthy.

Okay, enough of the business-y jargon,
Bascially, two people doing two jobs are better than one. 
And when thinking of how to describe these beauties, I couldn't help but notice the parallel.

These cookies, while salivating-ly gorgeous (am I right?!?), were trying too hard to be too many things to too many people.

And by no one's fault but my own.

It all started with a looming leftover box of Chex cereal from my Muddy Buddy Cookies.

Stupid Safeway, only had the ginormous box.
No one likes Chex that much.  
...it's not chocolate  
...there are no marshmallows  
...it's not chocolate 
...I didn't get the honey coated kind.  
...it's not...well, you know.              
[chocolate] couldn't help myself

Anyway, I bake too much to just throw stuff away.
Waste not, want not. 

So this remaining box of cereal just sat....for months...in my baking bin.
Until one fateful morning, when this morsel appeared in my inbox Chocolate Covered Cheerios.

How good do those sound????  And then the lightbulb  - *bling*

Chocolate covered Chex.
In a cookie.
A White Chocolate cookie.
With Chocolate Chips.

Ya, ya.  That sounds about right.
Only, it wasn't "about right."

It was "about" okay.

I was a little overzealous in my Chex adding.
Like, I just went for it.  
Waste not, want not remember?

And then my "white chocolate" batter just plain didn't work.
It should have dawned on me that this might be an issue when I couldn't find a recipe for white chocolate batter...anywhere...ever.  
I decided to melt white chocolate chips and add them to the batter.  

Easy, right?  

Only there is this interesting thing about chocolate chips - they don't like to be melted and runny...they like to be solid and together.  
So instead of white chocolate cookie dough, I had cookie dough with the tiniest, most minuscule white chocolate "flecks" splattered throughout.

I mean, these weren't terrible.
...But neither am I at juggling two jobs.

It's just, these weren't amazing...in fact, they were, dare I say, slightly disappointing.
...and well, I'm guessing you can fill in how I feel about the "job" part in this equation. 

So even though I'm about to spend a good chunk of time typing out the recipe below...I can't, in good conscience, rave and recommend making these.  At least, not without some tweaks.  

Like maybe only putting a cup of crunchy cereal...you know, instead of three.

And if that doesn't appeal to you - there are pictures.
Double Chocolate Cereal Cookies
[i.e. White Chocolate Cookie Dough, Chocolate Drizzled Chex, White and Semi-Sweet Chocolate Chips]
adapted and inspired by The Better Crumb & Cookies and Cups

  • 1 Cup Chex Cereal
  • 1 1/2 Cup Semi-Sweet Chocolate Chips (Saving 1/2 Cup for later)
  • 2 1/2 Cups Flour
  • 1 tsp Salt
  • 1 tsp Baking Soda
  • 12 oz Bag White Chocolate Chips (Saving 1/2 Cup for later)
  • 1 Cup Butter
  • 1/2 Cup Packed Brown Sugar
  • 2 Eggs
  • 1 tsp Vanilla
Preheat Oven to 325F Degrees
Cook Time: 8-12 minutes
Makes Approximately 20 Cookies
How to Make Chocolate Drizzle
1) Melt 1 Cup of Chocolate Chips in a microwave safe bowl, or a double boiler.  Let cool to almost
    room temperature. (The chocolate will be very hot and may burn you or melt the plastic bag we are
    going to place it in).
2) Once cooled, place melted chocolate into a ziploc bag.
TIP: I like to flip the bag inside out, pile the chocolate on the "inside" part of the bag, then flip it back
         right-ways in.
3) Just slip your hand into the middle of the bag while inside-out, cradle the chocolate with your hand
    and carefully pull the sides of the bag around it until the chocolate is now on the inside.  I do this to
    help keep the chocolate in one general area instead of sloppily spooned all over the bag.
4) Press all of the chocolate into one corner, twisting the top of the bag until a little "triangle" of
    chocolate is formed and packed.  Cut the tip of the corner with some scissors.  The smaller the
    opening the smaller the drizzle lines.
[NOTE]: After making these cookies, I found this "drizzle" step to be obsolete as the Chex just gets
               crumbled all to heck in the batter.  I'd skip this and save a good chunk of time.  Crushed
               Chex with white and semi-sweet chocolate chips is "chocolate covered" enough for me.  If  
               however, you want to take the time to hand dip each and every one...then more power to
               you.  Or, you can throw the Chex into a bowl with the melted chocolate and get them
               covered that way.  I recommend either of these options to the "drizzle."
5) If continuing on with the Chex drizzle: Lay out Chex flat on a baking sheet lined with parchment
    paper.  Drizzle chocolate over the tops.  Place in the fridge until chocolate sets and is firm to the
    touch.
6) In the meantime, you can start making the batter.  In a medium sized bowl, mix together flour, salt
    baking soda. Stir and set aside.
7) In a microwave safe bowl or double boiler melt white chocolate (set aside 1/2 cup of the chips for
    later). Let melted chocolate cool to almost room temperature. (We will be adding the butter next and
    we don't want it to melt).
8) Add cooled (but still melted) white chocolate to a medium sized bowl.  Add butter, cut into cubes.
    (This recipe doesn't call for softened butter so in order for it to mix well, it needs to be cut to a more
    manageable size).  Beat until combined and smooth.
9)   Add brown sugar, and combine.  
10) Next beat in the eggs, one at a time.
11) Add vanilla.  Next, add dry flour mixture a little bit at a time until thoroughly combined.
12) Here is where you add the Chex, and remaining 1/2 of white and semi-sweet chocolate chips that 
      you set aside.  I suggest adding the Chex 1st if you'd like them to be in smaller pieces, and 2nd if 
      you'd like them to be a little larger.  I added my 1st so I still had to add the chocolate chips.  By 
      the time I was done adding and mixing, I couldn't even see the Chex pieces anymore.  
13) Ideally, any batter will be chilled overnight, but if you don't have time it's not required here.  Place 
      heaping teaspoonfuls on a greased baking sheet and cook until "just done" - about 8-12 minutes. 
      Slightly golden and puffed, but not thoroughly set.  They will continue to cook on the baking sheet.  
      Leave on the sheet for 5 minutes before moving to a cooling rack 
TIP: If you want to make these larger, you can.  I did for these pictures - and I liked them better that 
        way.  You will just have to adjust the time accordingly.  Also, because of the Chex, these cookies 
        don't spread well in baking, so you want to slightly flatten them out before baking - especially the 
        larger cookies.
Sure these "goodie goodies" didn't quite live up to their expectations,
But, in this case, I have to say:
Some cookies
Are better than none cookies at all.