Showing posts with label pumpkin. Show all posts

Thursday, November 8, 2012

Pumpkin Cheesecake White Chocolate Brownies (★ ★ ★ ☆ ☆)

"Hey, uh, did you know your title is a mouthful?"
Um, ya, I did.  Sorry about that.
"Oh, oh no problem.  But it's just really long...borderline tongue twister.  My two year old couldn't even repeat it back to me."
...uh ...  Sorry?  ...mm ...  You probably shouldn't be feeding these to your two year old.  Maybe start with something more simple - like cheerios ... -and counting to 5?

Yes, readers.  That WAS random. 

But so was how this "thing" (bar...brownie...whatever you want to call it) happened.

I made these the same day as my Pumpkin Truffles.  I was, honestly, just trying to get rid of the rest of the canned pumpkin I had and this is what happened.

It was like the "Attack of the Living Baked Goods" night in my kitchen. 

-----

I have to back track a little bit.

October was the month of the pumpkin.
Pumpkin patches, pumpkin carving, pumpkin ice cream, pumpkin donuts, even pumpkin cereal.

Now don't get me wrong, I'm as "over the moon" excited as the next guy about Pumpkin Spice Lattes at Starbucks...but those are in September. When the novelty hasn't worn off.

In September, blog posts like this seem fun, light-hearted and fresh. (Okay it still kind of excites me...but that's beside the point!).

I became the Pumpkin Grinch.

I follow a lot of baking blogs and every one, every day was offering me some other shade of pumpkin.
Muffins, ganache, whipped cream, butter, foot scrubs, and toothpaste were presented to me on a big fat pumpkin platter.

And like all things, it seems good at first...
Oh yeah!  Ideas for fall baking!
But eventually we reach that "special" point.  The one I like to call "overboard."
Suddenly, what once used to bring me joy, now was just plain annoying. 

I was annoyed at having to see the same color food every day.
Annoyed that I had to think about pumpkin in ways I'd rather not - pumpkin seed guacamole??
But mostly I was annoyed that everyone had caught the pumpkin train, but me.  The market had been saturated.  Closed. Full.  Done.    

Okay, I was bitter and jealous!

I couldn't stand another pumpkin recipe, so I grumpily swore I would find "other" more "interesting" things to bake.  

But who am I kidding?  

It's November.  It's fall.  Thanksgiving is near.  
Now's the time we all start dreaming in pumpkin Technicolor.  

My intention was to only do one pumpkin recipe - because I had self-control - but like I told you, my kitchen had a mind of its own.  
The truffles took all of a measly third of a can of pumpkin. 
What on earth was I going to do with the rest?

Being a regular baker, I:
1) Hate wasting things I spent money on and
2) Enjoy double backing my baking efforts. (Bake two similar things in one night means no more baking for the week!)

After the whole truffle "ordeal," I wanted to make something that was drastically easier and a little more my forte - enter the brownie/bar.

I suddenly had visions of pumpkin cream cheese swirl atop a fudgey brownie.  But not a chocolate brownie...oh no - been there - done that.  Pumpkin and chocolate do NOT mix.  Don't argue with me, it's a fact. 

Sure that pumpkin pancake with chocolate chips tasted fine, but how many chocolate chips were in there?  5?  Ya, you act like it's chocolate and pumpkin, but it's really not.  That's the kind of thing you do to your cat when he needs to take medicine.  I'll just crunch a little in his food.  Mix in a couple treats and voila!  Medicine that no longer resembles medicine!

Enter: White chocolate.
Oh that glorious, fatty, un-chocolatey chocolate.
That would go stupendously with pumpkin!

I tore through my pinterest page, and found the white chocolate brownies I had been dying to try.
The stage was set.
But my own eagerness got in the way.

In my attempt to finish off the entire can of pumpkin, I doubled the cream cheese recipe thinking nothing of it.  I'll just have to cook it a little longer.  Sound familiar? (Cake in A Jar, anyone?)

Of course, this is not so. I had to cook them so long that the bottom got a little too brown and the top never quite set all the way. 

But for once, my own independence did not fail me.  Sure the texture was a little off (I fixed the proportions in the recipe below so you can make amazing, sanely proportional P.C.W.C. Brownies), but they tasted pretty good. 

I'm very critical of my baking, but just to paint you a picture of how good these are my mom kept RAVING about these. 
I mean RAVING.
This is the same mom who rolls her eyes every time I tell her I'm going to "veer" from a recipe.
The same mom who looks at me with the perfect amount of disapproval and acceptance of the fact that I'm an adult, when I come home with a huge bag of Hot Cheetos, Animal Cookies, and Thai Bubble Tea and tell her I'm going to go watch a movie.

Ya, that mom.
That mom ate half the batch.
And that's gracious estimating right there.
Pumpkin Cheesecake White Chocolate Brownies (or P.C.W.C.B for short)
adapted from  Nook and Pantry

White Chocolate Brownie Base
  • 1/2 Cup of Butter
  • 5oz. of White Chocolate Chips (Use Nestle)
  • 2 Eggs
  • 5 Tbsp Sugar
  • 1 tsp Vanilla
  • 3/4 Cup of Flour
  • 1/2 tsp of Baking Powder
  • 1/4 tsp of Salt

Pumpkin Cheesecake Top
  • 8oz of Cream Cheese (Use the Block Type)
  • 2/3 Cup of Sugar
  • 1 1/2 tsp of Vanilla
  • 1 Egg, plus one yolk
  • 2/3 Cup Canned Pumpkin Puree

Preheat oven to 325F
Makes approx. 15 good sized brownie/bars
 Brownies:
1) Measure out 5oz of white chocolate chips.  You can also use chopped white chocolate if you'd like.
    I bought Ghirardelli, but I was pretty disappointed in the texture.  I've only ever eaten Nestle White
    Chocolate before.  Of course, I figured Ghirardelli would be the best of the best, but I won't be
    buying this brand again...at least in white chocolate chips.
 2) Get 1/2 cup (one stick) of butter and cut into small pieces to help it melt faster.
 3) Melt the white chocolate and butter in a double boiler, stirring frequently.  Take off heat when just
     completely melted.  (You can use a microwave instead.  Just start with 1 minute then continue
     with 15 second increments until just melted.  Stir well between each heating).
 4) In a medium sized bowl, beat eggs and sugar together.
 5) Beat until fluffy...almost "meringue" like.  Add white chocolate mixture.
6) In a sifter add flour, baking powder, and salt.  Sift over the wet ingredients, mixing occasionally in-
    between adds.
 7) Add vanilla.
 8) Put into a greased 8in x 11in pan (you can use the standard 9in x 13in pan, but just remember they
     will be thinner and will need to cook less).
 Cheesecake:
A) In a medium sized bowl, mix together cream cheese, sugar, and vanilla.  Beat until fluffy.
 B) Add eggs, mix well.
 C) Add pumpkin, beat until just combined.  Pour mixture on top of white chocolate brownie base.
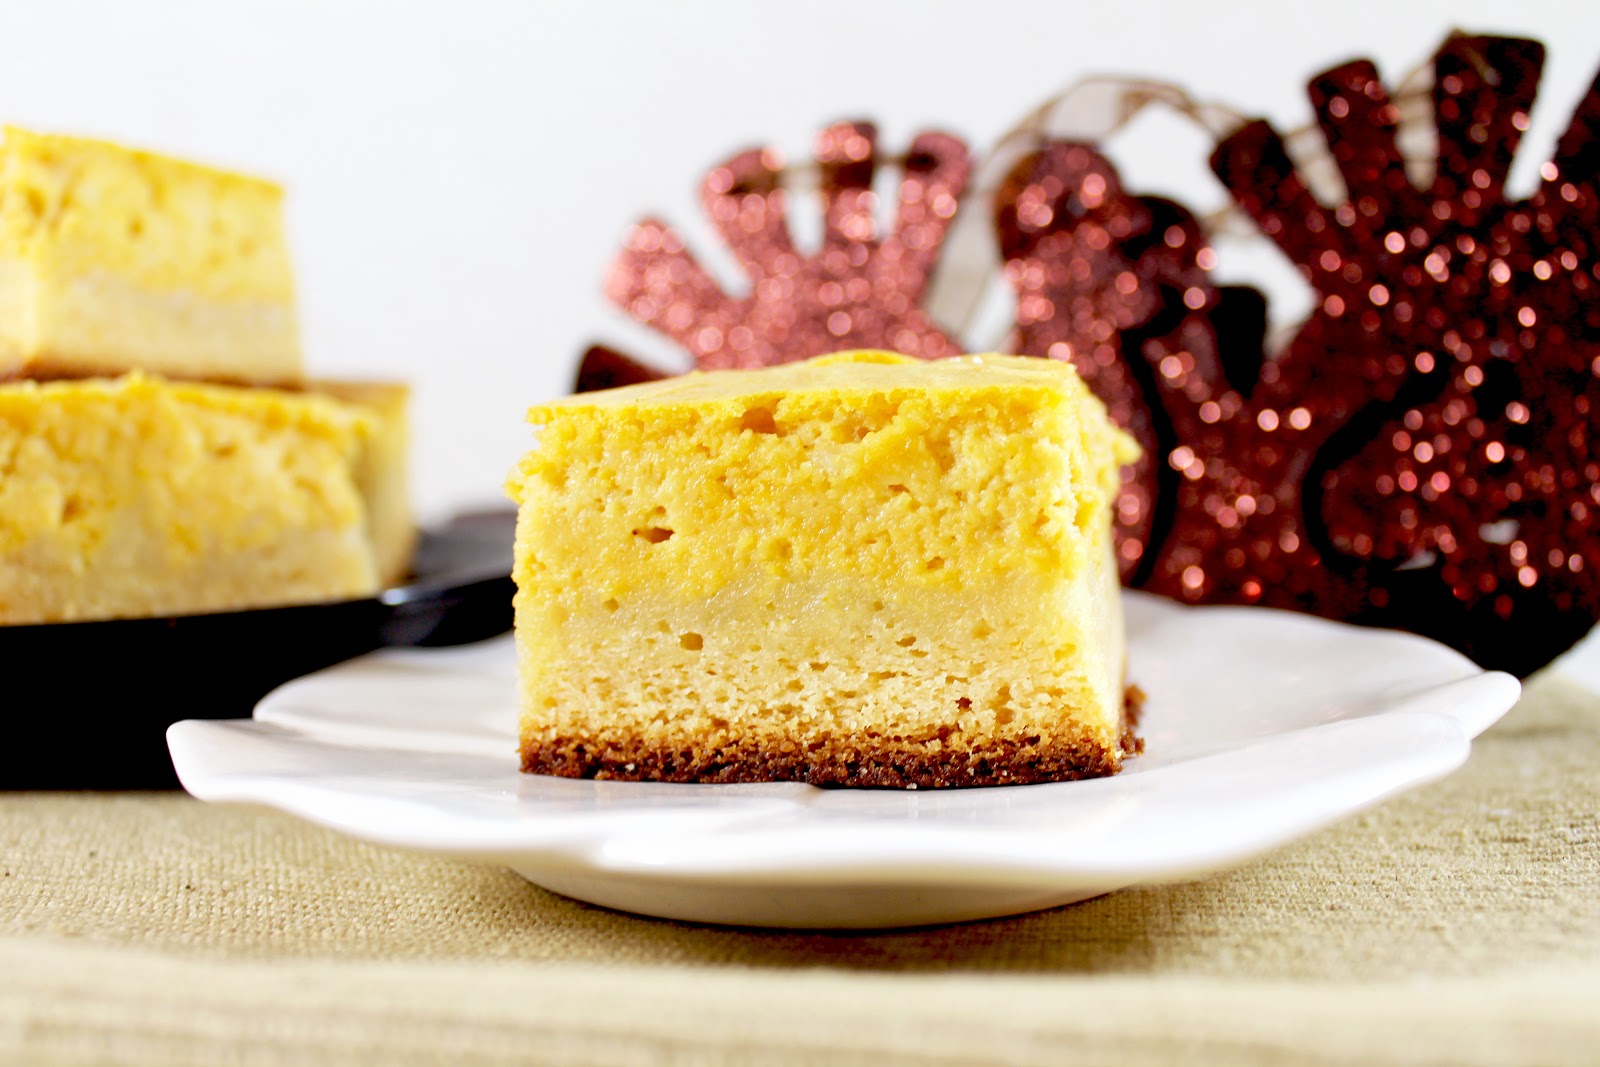
     *Optional: Take a knife and "cut" criss-crosswise the brownie/cheesecake batter in the pan.  This
     will mix some of the elements together and create a "swirl" design on top.  However, because the
     white chocolate and pumpkin are both pale colors the distinction will be slight.  Also if you don't do
     this, the brownie part will be more of a crust instead of a sort of "mixture."  Either way works.  I cut
     mine across a few times, but it didn't work too well as you can tell by the two layers clearly shown    
     in the pictures.
  D) Bake in oven at 325F for about 35 minutes or until cheesecake top is set.  You can test this by
       inserting a toothpick two inches from the edge.  It should come out relatively clean, with no wet
       batter.

[Cue music]
Drea-ea-ea-ea-eam, dream, dream, dream
I love you so and that is why
Whenever I want you, all I have to do is
Drea-ea-ea-ea-eam, dream, dream, dream


Thursday, November 1, 2012

Pumpkin Truffles (★ ★ ★ ☆ ☆)

Last night I learned a life lesson. 

Sometimes things don't turn out as planned.  

And you just have to let go.

Okay, so I've already had to learn this lesson.  Hello!...I've been alive for 25 years.  That's at 10,000+ opportunities for plans to go awry. 

But last night, I learned the other part of that lesson.  

The part that is: Sometimes things don't turn out as planned, and that can be beautiful.

These truffles proved this - not only in the figurative sense, but in the literal sense as well.

As in, they were literally more beautiful.  I had dark plans.  I was going to Zombify these bad boys.  We're talking bone sprinkles, green coating, eyeballs, and red food gel.  I had witty banter prepared to make you laugh and cry while craftily tying in not only Halloween, but also "The Walking Dead."  It was a Hallowinary (Halloween + Culinary) masterpiece.  

But alas, I am not a candy maker.  I should have learned and accepted this by now.  But Zombie truffles called to me and I have a knack for wanting to show anything up that dares to tell me "I can't."  Psht, oh really.  Wham bam. Schooled.  Burned.  I'm awesome.  Enjoy.   
So needless to say, these delicate confections you see before you were not at all what I had in mind. 

Of course, since it's Halloween I could still talk to you about zombies and the wonder that is "The Walking Dead," but I'm going to save it.  

Because these zombies are fantastically adorable.  

And I WILL succeed someday in making them for you. And on that day we will discuss apocalypse's  and "walkers."

But for now I'm just going to vent....
I obviously have a very high opinion of myself.  

Tell me how else do I always end up in these situations?

"Oh my gosh, this blogger made the most ridiculously amazing zombie truffles.  They're creative, have blood oozing out, and yet still somehow remain adorable...and they're perfectly shaped.  "Pin," please, cause I'm totally doing this!"

Ya, let's recap:

-So creative that they're disgusting and adorable at the same time.

-Perfectly shaped...as in she has mad skills.

Um, but I have magic culinary powers.  Sooooooo.... what's the problem again?

I was so confident in my abilities that I waited until the night before they needed to be somewhere to even attempt them. What's a trial run?  Don't need that!  I even got out all the decorations and put them in separate clear glass ramekins because, apparently, not only was this going to be like buttering toast, but I had also become Rachael Ray. 

Goopy, lumpy, messy.

That's what I came out with.

     ...after I realized that my truffles were in no way going to be firm enough to fashion in to spheres...
     ...and my dipping attempts turned into puddles of candy melts everywhere but on the truffles    
        themselves...
     ...when my mom decided to ask me if I needed help five minutes after she heard me "cussing up a 
        storm." (um, since when are guttural grumbles cussing?)  Convenient mom, very convenient...

I realized a new plan was in order.  A plan to embrace what these wanted to be.  

Which were simple "rustic" non-zombie truffles.  
They were screaming "sophisticate me, but in a non-perfect way."  
And I said, "You've got it.  That's the only way I know how."

Pumpkin Truffles
Adapted from Yummy Mummy Kitchen

2/3 Cup Gingersnap Cookies, ground into very fine crumbs
1/2 Cup Graham Crackers, ground into very fine crumbs
1/2 Cup Pumpkin Puree 
2 Tbsp Confectioner's Sugar
1/4 tsp of Cinnamon
1/4 tsp of Salt 
4 oz of Cream Cheese, softened from a block (don't use whipped)
2 cups of white chocolate, white coating, or white Candy Melts (coating is the easiest to work with but 
            the least flavorful...at my skill level I'd take ease over taste any day)

Makes approx. 24 truffles
2 hours chill time required

1) Set aside two large bowls.  In one, place about 4 graham cracker sheets and in the other about twenty 
    gingersnap cookies.  Crush into very fine pieces.  I used a meat tenderizer because the gingersnaps 
    were particularly hard.  The finer the pieces the smoother the filling of the truffles will be.  

 *Tip:  If you find it difficult to to get the crumbs fine enough and you don't want to dirty a huge food
   processor you can put the crumbs you've made into a coffee grinder.  It's quick, works well, and is an
   easy clean up.
 2) In a large bowl combine gingersnap crumbs, graham cracker crumbs, pumpkin puree, cream cheese,
     powdered sugar, cinnamon, and salt until well combined and smooth.
 3) Place mixture in the refrigerator and chill until firm - about 2 hours.
4) After pumpkin filling is thoroughly chilled, take large teaspoons full and roll into balls placing on a 
    baking sheet or plate lined with parchment paper or saran wrap.  Place in freezer until very firm 
    about 20 minutes. 
*Tip: Make sure to use a block of cream cheese, not the fluffy, softened kind in the plastic containers.   
  I used whipped cream cheese instead of the block.  I'm thinking this is why they didn't firm up enough 
  for me to roll...I kind of had to "plop."
 5) In a double boiler, melt white chocolate coating over medium heat.  Once melted, lower heat so the
    water below is just at a simmer.  
    You don't need a double boiler to do this, you can heat the bars in the microwave.  You'll just have
    to keep reheating periodically because this type of coating is designed to harden very quickly at room
    temperature.
*Tip:  Normally, I use Candy Melts (found at Michael's or Joanne's), but I found this coating at
  Safeway in the baking section and I was really happy with it.  It was much thinner than the Candy
  Melts or Real White Chocolate Chips, which means easier for dipping and better for eating.
*Tip:  Learn from my mistakes 1) Don't be afraid to melt all the coating you bought.  It's not wasteful.  
  The more you have for dipping the easier your job will be.  2) Make sure you have a deep enough 
  area to dip your truffles in.  I used a long skinny cup on top of my double boiler to help condense the 
  area.  It worked okay, but next time I would use a large ramekin.  Make sure it's wide enough to easily 
  dip, but also deep enough to cover the fillings completely in one dipping motion.
 *Tip: Buy these dipping tools!  They are life savers.  No sticking your fingers in the melted coating.
   No having to stab the spheres with a stick and leave a hole.  I got these for $3.50 at Michaels and
   with a 40% off coupon that's $1.40.  A kindergartener could afford these.  Don't be cheap!
6) So dipping the truffles is a lot of trial and error, but here's how it went for me.  
    -Make sure fillings are very chilled.  If they start warming up - stop - and rechill them.  
    -Place a ball on the dipping tool and in a swift motion dip, twirl, and pull up.  
    -Carefully tap the tool on the edge of the cup/bowl to remove excess coating.  Don't scrape the truffle   
     on the side or let any pieces fall in.  It makes the coating lumpy and it will never be the same.  A 
     little extra coating on one truffle is a lot better than having to remake the coating completely (like I 
     did - notice the change in cups).  
    -Place coated truffle on parchment paper.  
    -If need be, once the truffle has hardened (about 3 minutes - you can speed up the process by putting 
     them in the freezer) you can re-coat if the first layer was too thin or missed some spots.  
    -Sprinkle with left over cookie crumbs immediately before the outside layer begins to set.
7) After truffles have hardened you can remove any excess "feet" by carefully pressing a knife to the
    base of the truffles.  These should be fine at room temperature for a few hours, but if you are going to
    be saving some store in the fridge for up to a week or in the freezer for longer.

 I think Rachael Ray would approve.  "Yummo!"


This post was featured on:


Wednesday, April 11, 2012

Pumpkin Bread Pudding Muffins (★ ★ ★ ★ ☆)


I love the Fall.  I love the leaves.  The slight nip in the air.  The clothes, colors, and most of all Thanksgiving.  When it was my duty to bring muffins to our cafe again, I wanted to conjure up these comforting fall memories.

I go to Starbucks a lot.  Too much, especially since they make a mediocre latte.  But they're convenient, therefore, I love them.  And that's half the battle.  Starbucks offers a pumpkin muffin with a cream cheese top that looks fabulous.  Mind you, I've never actually tried it.  Starbucks isn't where I go if I want a baked good, but the idea of it was all I needed.

Pumpkin it was.

There were a ton of pumpkin cream cheese muffin recipes.  But most had a cream cheese filling, which is not what I was going for.

And wouldn't you know it, the recipe I ended up deciding on was a homage to the Starbucks version:
Pumpkin Cream Cheese Muffins Like Starbucks


Because I used such a large muffin pan, I had to cook them longer than normal and the tops got a little dark.  They didn't taste burned though.  So I decided to rectify this by dusting them with a little powdered sugar. Viola!


Instead of using the prescribed amount of canned pumpkin, I just plopped the entire thing in there.  It ended up working really well.  They were so moist!  Almost like a pumpkin bread pudding.

I also opted out on the pumpkin pie spice.  Honestly, it saved this recipe.  I like pumpkin pie, but I didn't want these muffins to have the same "tang."  I wanted them to be reminiscent of fall, but also to be able to stand alone.


These were delicious.  The cream cheese top was the perfect off-set to the pumpkin flavor of the bottoms.  I would definitely make these again.


Linking up here Oct 2012.  Because these were so good they should be revisited.