Showing posts with label 3 Star. Show all posts

Monday, August 5, 2013

Fluffernutter Cupcakes (★ ★ ★ ☆ ☆)

Well, well, well.  Long time no see.

Guess what?!

I'm guest posting over at Not Your Ordinary Recipes today!

Go and check these Fluffernutter Cupcakes out!

-Nat


-----

These cupcakes were featured:


Thursday, June 6, 2013

Thai Tea Two Ingredient Ice Cream (★ ★ ★ ☆ ☆)

So "Phase One" of Rebuild Natalie's world is complete.

My Bestie is all moved and settled into the Coastal Land of the Hippies...more commonly known as Santa Cruz.  

And I've only been to visit her twice!  
She's been gone five whole days!  

That's pretty impressive considering we've seen each other practically every day since we decided to become BFF's three years ago.  

Yes, we literally just decided...like kids in kindergarten.  
And the rest is history!

I have to say, though, I knew I would miss her once she moved out, but I thought I'd miss our lamenting over the decline of "Smash" sessions or her incessant need to show me every. single. item of clothing she bought that day (yes, every. day.).  

So I was surprised that it hit me hardest at 6:30am, the morning after we moved her out.  
Because I am a morning grump!
I've spent the past ten months praying every morning that our paths wouldn't cross for at least a good half hour...or better yet - ever.

I know!  I sound horrible.
It's because I am!

I need the morning to adjust to being alive again. What am I doing?  Why am I here?  Do I really exist?
These are some of life's most difficult questions and I get asked them each and every morning.  
So ya, I'm not really excited to talk about how amazing it will be when we all have a chance to walk on the moon.  At this moment, I kinda want to blow up the moon.

But that morning, it hit me.  I would never inconveniently bump into her again.  Those weepy Dolly Parton serenades that used to aggravate me to no end, now sounded kind of sweet.

Don't get me wrong, I'm still not fully functional until 8am.  
It's been a few days and I think I've gotten the hang of this new routine.
So I think I'll stick with the memories for now. :)
One of my favorite memories, though - untainted by morning grumpiness - has to be the day Bestie introduced me to Thai Tea.

I had dragged her to a Salsa lesson at my University because I needed extra credits for my PE class, and I didn't want to go and face the swarms of creepy men who had no where else to be on a Friday night alone.

I realize now, that this was at the very, very beginning of our friendship because she wouldn't be caught dead going to a Salsa class now.  Oh, the things you'll do in the early stages of a relationship. (Like pretend you can tolerate 80's movies!)

Afterwards, we stopped by the resident college "Boba" shop and I ordered my usual blended coffee with pearls.  But Bestie.  She ordered this orange stuff.  And it changed my life.

Thai Iced Tea is slightly sweet, creamy, and a little spicy.  It's reminiscent of Chai, but has its own unique qualities.

At that moment, I was introduced to one of my new favorite foods.  Where had this drink been all my life???

Best friend?
Who needs a best friend when there is Thai Tea?
"Thai Tea" Two-Ingredient Ice Cream (Machine *Not* Needed)
Utilized Important Information from Use Real Butter

  • 3 Cups of Heavy Whipping Cream (set aside 1 cup)
  • 1/2 Cup Thai Tea Leaves (found at Asian food stores or here)
  • 1 Can (14 oz) Sweetened Condensed Milk

Needed:
-Strainer
-Airtight Storage Container
-Makes 8+ Servings
*Requires Cooking, Cooling, and Overnight Freezing Time*


So I know there are actually 3 ingredients, but the base to make plain ol' ice cream is just two ingredients.  Plus, no machine required!  Hello! Amazing. 
1) In a large saucepan, bring 2 cups of cream to a low boil.  
2) Immediately remove from heat and add in Thai Tea.  Stir until completely combined
    and let steep for 30 mins.


3) Place strainer over large bowl and pour tea mixture over it.  Try to press out any remaining liquid 
    to get a much of the tea infused milk as you can out of the leaves.  You'll notice you've lost a lot of 
    volume.  What was once runny and 2 cups is now thick and 1 cup. 
4) Let cream cool to just about room temperature, then let cool completely in the fridge (at least 2   
     hours).  I reused the cream container to store this mixture. 
5) 10-15 mins before starting the next step after the mixture has cooled, place large mixing bowl in  
     the freezer.  This will help the cream whip up faster.


6) Pour Thai Tea mixture along with the extra 1 cup of cream into the cold bowl.  Beat until fluffy and 
    no longer runny.  Stiff peaks should form. 
7) Once cream is whipped, fold in the sweetened condensed milk just until combined. 
8) Place mixture into a covered container (tupperware, etc.) and place in freezer.  Freeze overnight. 
    Scoop.  Enjoy!

Thoughts: This was good, but a little on the sweet side and the tea strength was a bit overpowering.  Next time I would definitely use less tea - probably only 1/3 Cup, and I would play around with the cream to condensed milk ratio.  

I was very skeptical about this whole "two-ingredient" fad when I decided to try it last summer.  I just couldn't believe that something so simple could actually become "ice cream."  But I have to say, it's pretty darn close.  If you want the real deal you've got to use a machine, but if you are looking for quick, simple, and easy this isn't a bad option at all. 

A word of warning though: because it's pure whipped cream and a whole lot of sweetened milk this type of ice cream is very intense and rich.  One scoop is usually plenty. 

Thai Tea is life-changingly delicious.
But I'll admit, it's no substitute for a cherished friend.
Throwing some Boba on top doesn't hurt though.


-----
This posted was featured on:


Thursday, February 28, 2013

Blueberry Cupcakes w/ Lemon Mascarpone Frosting (★ ★ ★ ☆ ☆)

This past week we were privy to the ultimate in Hollywood glamour, sophistication, and artistry.

Or at least, that's what we're promised...and crossing our fingers for.

But whether or not the Avengers received one too many nominations or Seth MacFarlane has a beyond amazing voice and a dirty mouth, I love taking part in this night reserved for the film elite.

The Academy.

The Awards.

The Oscars.
Every year we have a little party.

I say "little" because there's less than ten people.

But trust me, we do not take this day lightly.

There's food.  Trivia.

And my favorite.
Voting.

Each person gets a ballot and casts their vote for the winners.  Whoever predicts the most correctly is bestowed a prize.

Last year it was a box of Girl Scout Thin Mints.  A small token to some, but, man, did it feeeeeeel good!

Every year, the competition gets more intense.
By now, we've all added "pre-Oscar research" to our list of things to do before the big day.
Weighing five opinions per category is totally reasonable, right? 

But the best part of this years show -- we'll go ahead and leave Seth MacFarlane, in a suit (weakness #1), singing in the vein of Ol' Blue Eyes (weakness #2), out the equation -- the best was this dress and Jennifer Lawrence.

All of her.
She's a Hollywood experiment.

Like somebody thought it would be a hoot to throw in a completely normal, exceedingly awkward, yet surprisingly talented girl into the mess that is fame, fortune, and Jack Nicholson.

I mean, how totally relatable is she?!?  Am I right?

No other actress I know of is so starstruck by every celebrity she meets, freely brings up her "hyperactive" bladder, and spews any off-the-wall comment that comes into her pretty little head.

So when she tripped on that first stair on her way to accept her award, I just chuckled to myself, "Oh. That's so Jenn!"

Like we're buddies or something.
Only, we're not.
But we totally could be!
So to celebrate this great achievement of hers (and those of many others), I made these cupcakes.

Because nothing says "Wow, you were outstanding in that movie!  When you cried, there was snot -- and in that moment, you were unattractive.  Clearly your dedication was above all else this year" like a rustic looking blueberry and lemon mascarpone cupcake. 

So maybe I won't be winning "Best Train of Thought" or "Best Appropriately Themed Cupcake."

But that's okay.  Because everyone loved them.

The cupcakes were so dense and moist.
And the frosting was the perfect blend of cream, lemon, and sweetness.

Perfect enough to help hide the fact that I forgot half of the sugar in the cupcakes when I doubled the recipe.  

Twice. the. amount. means. twice. the. sugar.

Classic Nat!
Blueberry Cupcakes
adapted from Sallys Baking Addiction

  • 3 Cups Flour
  • 1 tsp Baking Powder
  • 1/2 tsp Baking Soda
  • 1 tsp Salt
  • 2 Cups Sugar
  • 1 Cup (2 sticks) Unsalted Butter, melted
  • 2 Eggs
  • 1/2 Cup Plain Greek Yogurt
  • 1 1/2 Cup Milk
  • 4 tsp Vanilla Extract
  • 1 Package of Freeze Dried Blueberries (1.2 oz or 1/4 Cup Ground)


Lemon Mascarpone Frosting
adapted from Week of Menus

  • 4 Tbsp (1/2 Stick) of Butter, softened
  • 8oz Mascarpone Cheese
  • 2 1/2 Cups Powdered Sugar 
  • Zest of 1 Lemon
  • (Optional) Additional Lemon Juice to Taste


Makes Approx. 24 Cupcakes
Preheat Oven to 350F
1) In a medium bowl, combine flour, baking powder, baking soda, and salt.  Mix and set aside.
2) In a large microwave safe bowl, melt the butter.  Heat in 30 second increments.
    Note: If you don't have unsalted butter, that's okay.  Just omit the added teaspoon of salt listed in 
              the recipe. 
3) Add sugar to the melted butter and stir until sugar starts to dissolve.  The mixture will still be very 
    grainy.  Place bowl in refrigerator for 1 minute. 
4) Take butter/sugar bowl out of the fridge and add the remaining wet ingredients one at a time, beating 
     in between each addition - eggs, yogurt, milk, and vanilla.

5) Add the dry ingredients to the batter in small increments until well combined.
6) In a food processor (or coffee grinder) grind the freeze dried blueberries until almost a fine powder.
7) Add ground blueberries to batter and beat/stir well.
8) Line a muffin tin with cupcake liners and fill each to about 3/4 full.  
9) Bake at 350F for approx. 20 minutes or until a toothpick, inserted into the center, comes out clean.  
    Allow these to cool completely before frosting. 
10) For Frosting: Beat together softened butter and mascarpone cheese.  Mixture should be fluffy.
11) Add lemon zest and sugar, one cup at a time.  For stiffer frosting, add more sugar.  
If Jenn gets to win, then why can't I?
Clearly I'm not above self promotion, people.


*Special thanks to my sister for being obnoxiously photo happy, yet very helpful in snapping away at me baking this week.  One less day to have to worry about getting flour and butter caked into my lens.


Thursday, February 21, 2013

"Birthday Cake" Seven Layer Bars (★ ★ ★ ☆ ☆)

No, this picture isn't dangerous.

Okay, ...it is a little bit.

Okay, I kind of freaked out that the whole thing would tumble over and my lovely light box would burst into flames.

But how else was I supposed to create such a "subtle" foreshadowing?
Anything for art, right?

---------

So besides the November-to-December holiday montage, February is my favorite time of year.

No, not because it's Valentines Day.

Although, I do like the whole "chocolate" binge aspect.

And I'm sure the whole "love" aspect is swell too, but I've had a total of two valentines dates throughout my entire existence so the ratio of Dates on V-day to Not Dates on V-day is none too inspiring.

And it's not even because February is the only month that never reaches thirty days...although, I have to admit that is pretty cool.

Nope those aren't the reasons.

February is my favorite time of year...
...BECAUSE IT'S MY BIRTHDAY!


And this year, I'm closer to thirty than I've ever been.  

So I'm celebrating
...all month long. 
Because I deserve it.

To help you join in on all the festivity and help you get to know me a little better, I thought it'd be fun to answer a few questions about myself.  

The more you know, the more you care, right?       RIGHT?!         right?


Don't blame me for these questions. 
If this is what Google says the world wants to know, then who I am to argue?
I mean, it's Google.  

So without further ado...  (be glad I whittled these down from my original "twenty-six" question idea!)

1. What is your favorite time of the day? 
    Pretty much the parts of the day where my stomach starts to grumble.  Because then it's "sanctioned"  
    chow time!

2. What are you absolutely best at?
    Answering questions about myself!  I'm the best in the world...in the universe!!

3.  If you were a book, which book would you be?
    A book with lots of short chapters.  I hate chapters that go on a hundred pages strong.

4.  Do you know how many pieces of clothing you own?
    The amount where a "one in, one out" rule has become a necessary evil.   

5.  Which song would you rather wake up to in the morning?
     Let's get real, it's Freddie Mercury's..."We are the Champions."  Try not getting pumped to that. 

6.  Aside from Ricky Martin, which artist do you listen to the most?  
     Well since I listen to Ricky Martin, um...., never....I'd have to say every artist in the world.  Even 
     Rebecca Black.  Because even I know that "yesterday was Thursday, today is Friday" and we be 
     "partyin' partyin' yeah!"

7.  If you could have dinner with anyone, who would you choose?
     I think I'm going to have to go with Derek Wills on this one.  *Sigh* ...that salt and pepper hair  
     ...that British accent  ...that seductive-one-moment/rip-you-a-new-one-the-next bad boy quality.  I 
     am taken.

8.  What 3 things would you not take with you to an island?
     Really? Most unproductive question. Ever. But obviously I wouldn't bring 
     1) My new Smash DVD's.  Only because there is no electricity...unless this is "The Island" - from 
         Lost.  Then I'd be A-okay. 
     2) Any of the plants from my backyard.  Because, in my imagination, this island is full of trees and
         tropical flowers so my plants would be redundant and outshone in comparison. 
     3) My cat.  As much as I love him, he'd drive me crazy while I was trying to build a "Robinson 
         Family" worthy treehouse and get an even tan. 

9.  What would you do if you found a wallet and there was no ID in it?
     Bury it.  Honesty prevents me from taking someone's money.  But if I can't have it then neither can 
     you!

10. How different would your life be if you were to live in Africa?
      Pretty different.
Since we're totally close now - I opened up so much! - I feel we can appreciate what happened in my kitchen this past week even more.

Seven Layer Bars.
Birthday Style.

And I'm not talking your normal "seven-layers-actually-translates-to-seven-ingredients" bars - I'm talking

Count em', Seven...


1 - Golden Oreos
2 - Funfetti Cake Batter
3 - Marshmallows
4 - White Chocolate
5 - Semi-sweet Chocolate
6 - Coconut
7 - Sprinkles


....Layers.

Sticky Sweetness.


Birthday Cake Seven Layer Bars
Inspired by The Domestic Rebel

  • 1 Cup of Golden Oreos, Crushed with Cream Removed
  • 3/4 Cup Butter (1 1/2 Sticks), Divided
  • 1 Box Funfetti Cake Mix
  • 1 Egg
  • 3/4 Cup Marshmallows
  • 1/2 Cup White Chocolate Chips
  • 1/2 Cup Semi-Sweet Chocolate Chips
  • 1 Cup Flaked Coconut
  • 1 - 14 oz Can of Sweetened Condensed Milk
  • 1/3 Cup Multicolored Sprinkles

Needed a 9x13in pan
Preheat oven to 350F Degrees
Makes Approx. 20 Bars

1) Gather all the ingredients together.  These bars are easy, but there are a few steps because of all the
    different layers.


2) Separate Oreo cookies from the creams.  I bought the Birthday Cake variety, but once you remove 
    the cream there isn't much difference between these and the standard Golden.  
3) Finely crush the Oreo cookies until you get a cups worth of crumbs.  This is about 3/4 the package.  
    Start with a meat tenderizer or a Ziploc bag and your hand to make the crumbs.  If you need them 
    finer place into a food processor or, if you are lazy like me, a cleaned coffee grinder. 
4) Place 1/2 stick of butter (1/4 cup) into the bottom of a 9x13in pan.  Let it melt in the oven.  
5) Add Oreo crumbs on top of the melted butter and pat down gently.

6) In a medium bowl, combine funfetti cake mix, egg, and rest of the butter (melted).  
7) Take pieces of batter, flatten them in your hand and add to oreo cookie base.  Make sure the entire 
    bottom layer is covered.  Add these gently as you don't want to disrupt the crumb crust.
8) Bake in the oven for 10 minutes.
9) Carefully remove slightly baked cake/oreo layers and add marshmallows.


10) Add white chocolate chips, semi-sweet chocolate chips, and cocount. 
11) Pour can of sweetened condensed milk over the entire thing.  Make sure everything gets covered. If    
      you can do with less than a can then stop there.  The less you have to use the better.  It's really, 
      very sweet.
12) Disperse sprinkles across the top. 
13) Bake for 15-20 minutes, until the top begins to get golden and bubbly.  Remove from oven and 
      cool completely on a cooling rack before cutting into pieces.  

Happy Birthday to me!


----------------------

Oh my goodness!  Thanks so much for viewing.  These were featured during The Back For Seconds Link Social on March 5, 2013 and Blooms Designs Link Party on March 6, 2013.  Click the icons to check it out!!!


Also featured on:


Friday, February 1, 2013

Double Chocolate Cereal Cookies (★ ★ ★ ☆ ☆)


I don't know that I've ever related to a cookie more.

You see for the past month, I've been doing two people's jobs.  

Worn two (though similar) hats...
Tried to maintain the quality of my work along with the person's that I am covering for...
Dropping one to pick up the other...

And what does it result in?

Adequate performance.
Nothing crumbling to pieces.
Nothing amazingly praiseworthy.

Okay, enough of the business-y jargon,
Bascially, two people doing two jobs are better than one. 
And when thinking of how to describe these beauties, I couldn't help but notice the parallel.

These cookies, while salivating-ly gorgeous (am I right?!?), were trying too hard to be too many things to too many people.

And by no one's fault but my own.

It all started with a looming leftover box of Chex cereal from my Muddy Buddy Cookies.

Stupid Safeway, only had the ginormous box.
No one likes Chex that much.  
...it's not chocolate  
...there are no marshmallows  
...it's not chocolate 
...I didn't get the honey coated kind.  
...it's not...well, you know.              
[chocolate] couldn't help myself

Anyway, I bake too much to just throw stuff away.
Waste not, want not. 

So this remaining box of cereal just sat....for months...in my baking bin.
Until one fateful morning, when this morsel appeared in my inbox Chocolate Covered Cheerios.

How good do those sound????  And then the lightbulb  - *bling*

Chocolate covered Chex.
In a cookie.
A White Chocolate cookie.
With Chocolate Chips.

Ya, ya.  That sounds about right.
Only, it wasn't "about right."

It was "about" okay.

I was a little overzealous in my Chex adding.
Like, I just went for it.  
Waste not, want not remember?

And then my "white chocolate" batter just plain didn't work.
It should have dawned on me that this might be an issue when I couldn't find a recipe for white chocolate batter...anywhere...ever.  
I decided to melt white chocolate chips and add them to the batter.  

Easy, right?  

Only there is this interesting thing about chocolate chips - they don't like to be melted and runny...they like to be solid and together.  
So instead of white chocolate cookie dough, I had cookie dough with the tiniest, most minuscule white chocolate "flecks" splattered throughout.

I mean, these weren't terrible.
...But neither am I at juggling two jobs.

It's just, these weren't amazing...in fact, they were, dare I say, slightly disappointing.
...and well, I'm guessing you can fill in how I feel about the "job" part in this equation. 

So even though I'm about to spend a good chunk of time typing out the recipe below...I can't, in good conscience, rave and recommend making these.  At least, not without some tweaks.  

Like maybe only putting a cup of crunchy cereal...you know, instead of three.

And if that doesn't appeal to you - there are pictures.
Double Chocolate Cereal Cookies
[i.e. White Chocolate Cookie Dough, Chocolate Drizzled Chex, White and Semi-Sweet Chocolate Chips]
adapted and inspired by The Better Crumb & Cookies and Cups

  • 1 Cup Chex Cereal
  • 1 1/2 Cup Semi-Sweet Chocolate Chips (Saving 1/2 Cup for later)
  • 2 1/2 Cups Flour
  • 1 tsp Salt
  • 1 tsp Baking Soda
  • 12 oz Bag White Chocolate Chips (Saving 1/2 Cup for later)
  • 1 Cup Butter
  • 1/2 Cup Packed Brown Sugar
  • 2 Eggs
  • 1 tsp Vanilla
Preheat Oven to 325F Degrees
Cook Time: 8-12 minutes
Makes Approximately 20 Cookies
How to Make Chocolate Drizzle
1) Melt 1 Cup of Chocolate Chips in a microwave safe bowl, or a double boiler.  Let cool to almost
    room temperature. (The chocolate will be very hot and may burn you or melt the plastic bag we are
    going to place it in).
2) Once cooled, place melted chocolate into a ziploc bag.
TIP: I like to flip the bag inside out, pile the chocolate on the "inside" part of the bag, then flip it back
         right-ways in.
3) Just slip your hand into the middle of the bag while inside-out, cradle the chocolate with your hand
    and carefully pull the sides of the bag around it until the chocolate is now on the inside.  I do this to
    help keep the chocolate in one general area instead of sloppily spooned all over the bag.
4) Press all of the chocolate into one corner, twisting the top of the bag until a little "triangle" of
    chocolate is formed and packed.  Cut the tip of the corner with some scissors.  The smaller the
    opening the smaller the drizzle lines.
[NOTE]: After making these cookies, I found this "drizzle" step to be obsolete as the Chex just gets
               crumbled all to heck in the batter.  I'd skip this and save a good chunk of time.  Crushed
               Chex with white and semi-sweet chocolate chips is "chocolate covered" enough for me.  If  
               however, you want to take the time to hand dip each and every one...then more power to
               you.  Or, you can throw the Chex into a bowl with the melted chocolate and get them
               covered that way.  I recommend either of these options to the "drizzle."
5) If continuing on with the Chex drizzle: Lay out Chex flat on a baking sheet lined with parchment
    paper.  Drizzle chocolate over the tops.  Place in the fridge until chocolate sets and is firm to the
    touch.
6) In the meantime, you can start making the batter.  In a medium sized bowl, mix together flour, salt
    baking soda. Stir and set aside.
7) In a microwave safe bowl or double boiler melt white chocolate (set aside 1/2 cup of the chips for
    later). Let melted chocolate cool to almost room temperature. (We will be adding the butter next and
    we don't want it to melt).
8) Add cooled (but still melted) white chocolate to a medium sized bowl.  Add butter, cut into cubes.
    (This recipe doesn't call for softened butter so in order for it to mix well, it needs to be cut to a more
    manageable size).  Beat until combined and smooth.
9)   Add brown sugar, and combine.  
10) Next beat in the eggs, one at a time.
11) Add vanilla.  Next, add dry flour mixture a little bit at a time until thoroughly combined.
12) Here is where you add the Chex, and remaining 1/2 of white and semi-sweet chocolate chips that 
      you set aside.  I suggest adding the Chex 1st if you'd like them to be in smaller pieces, and 2nd if 
      you'd like them to be a little larger.  I added my 1st so I still had to add the chocolate chips.  By 
      the time I was done adding and mixing, I couldn't even see the Chex pieces anymore.  
13) Ideally, any batter will be chilled overnight, but if you don't have time it's not required here.  Place 
      heaping teaspoonfuls on a greased baking sheet and cook until "just done" - about 8-12 minutes. 
      Slightly golden and puffed, but not thoroughly set.  They will continue to cook on the baking sheet.  
      Leave on the sheet for 5 minutes before moving to a cooling rack 
TIP: If you want to make these larger, you can.  I did for these pictures - and I liked them better that 
        way.  You will just have to adjust the time accordingly.  Also, because of the Chex, these cookies 
        don't spread well in baking, so you want to slightly flatten them out before baking - especially the 
        larger cookies.
Sure these "goodie goodies" didn't quite live up to their expectations,
But, in this case, I have to say:
Some cookies
Are better than none cookies at all.


Thursday, January 24, 2013

Honey Ricotta Stuffed Figs (★ ★ ★ ☆ ☆)

Inspiration can strike at any moment.

And when it does you have to be ready to just take it - and run.  

Why?  

Because if you don't, you can miss out on baking things like Honey Ricotta Stuffed Figs.  

Actually, let me raise the stakes a little bit...

If you don't, you can miss out on creating things like Nat's Adventures In Baking.  

I don't really remember what inspired me to finally sit down and open a blogger account.

I've always loved to bake.  
Instead of waking up early on Saturday mornings to watch cartoons, I'd be making muffins and bothering my poor mother while she tried to get her well-deserved eight hours of sleep.

They weren't always good...or ever...for that matter, but I still loved it.  And to this day, I blame the recipe, not my ten-year-old lack of skills.

Flash forward to 2010.
I'm pretty sure it was Bestie who finally convinced me to do it. 

Chronicle my baking escapades?  Alright.  Why not?

What I wanted was "Adventures In Baking."  
But some over-excited blogger had already scooped up that name.
I say over-excited, because now their site is about...not baking...and goes by a different title.  Way to hog the goods there guys, thanks.

But that's besides the point, what's actually important is the fact that I ended up adding my nickname "Nat."

I had never once...until that moment...referred to myself as anything other than my legal name, Natalie.

Not Natty.
Or Noodles.
Or Nanny.

Or, the one that seems to follow me wherever I go...Nat. 

But for some reason, at that moment, when blogger asked me a most poignant question: 
"what. is. your. blog. name?" 
I added "Nat."

At first, it was just my way of saying "nah, nah. nah, nah, nah!" I still get my title!  But eventually, I realized that Nat's Adventures In Baking is a whole heck of a lot better than plain ol' boring Adventures In Baking

There is a real person behind this blog.  She likes to get flour and egg caked on her clothes, (Man, I should really wear an apron more often), complain about "other people's" mess ups, and spend hours adjusting the white balance and such in her photos.   

What better way to convey that, than to announce it from the rooftops?
Inspiration is a funny fellow.

If it wasn't, then I wouldn't have ended up at an organic creamery, in downtown Santa Cruz, downing a cone full of Fig and Ricotta ice cream, in the pouring rain.

Rain + Ice Cream.
Who does that?!  
It was the figs and ricotta.  They made me do it.  Beckoning me.  Luring me in with their siren song.

Although it was not there to cause me harm.

It was good.
Too good.
So good, that it led to this.

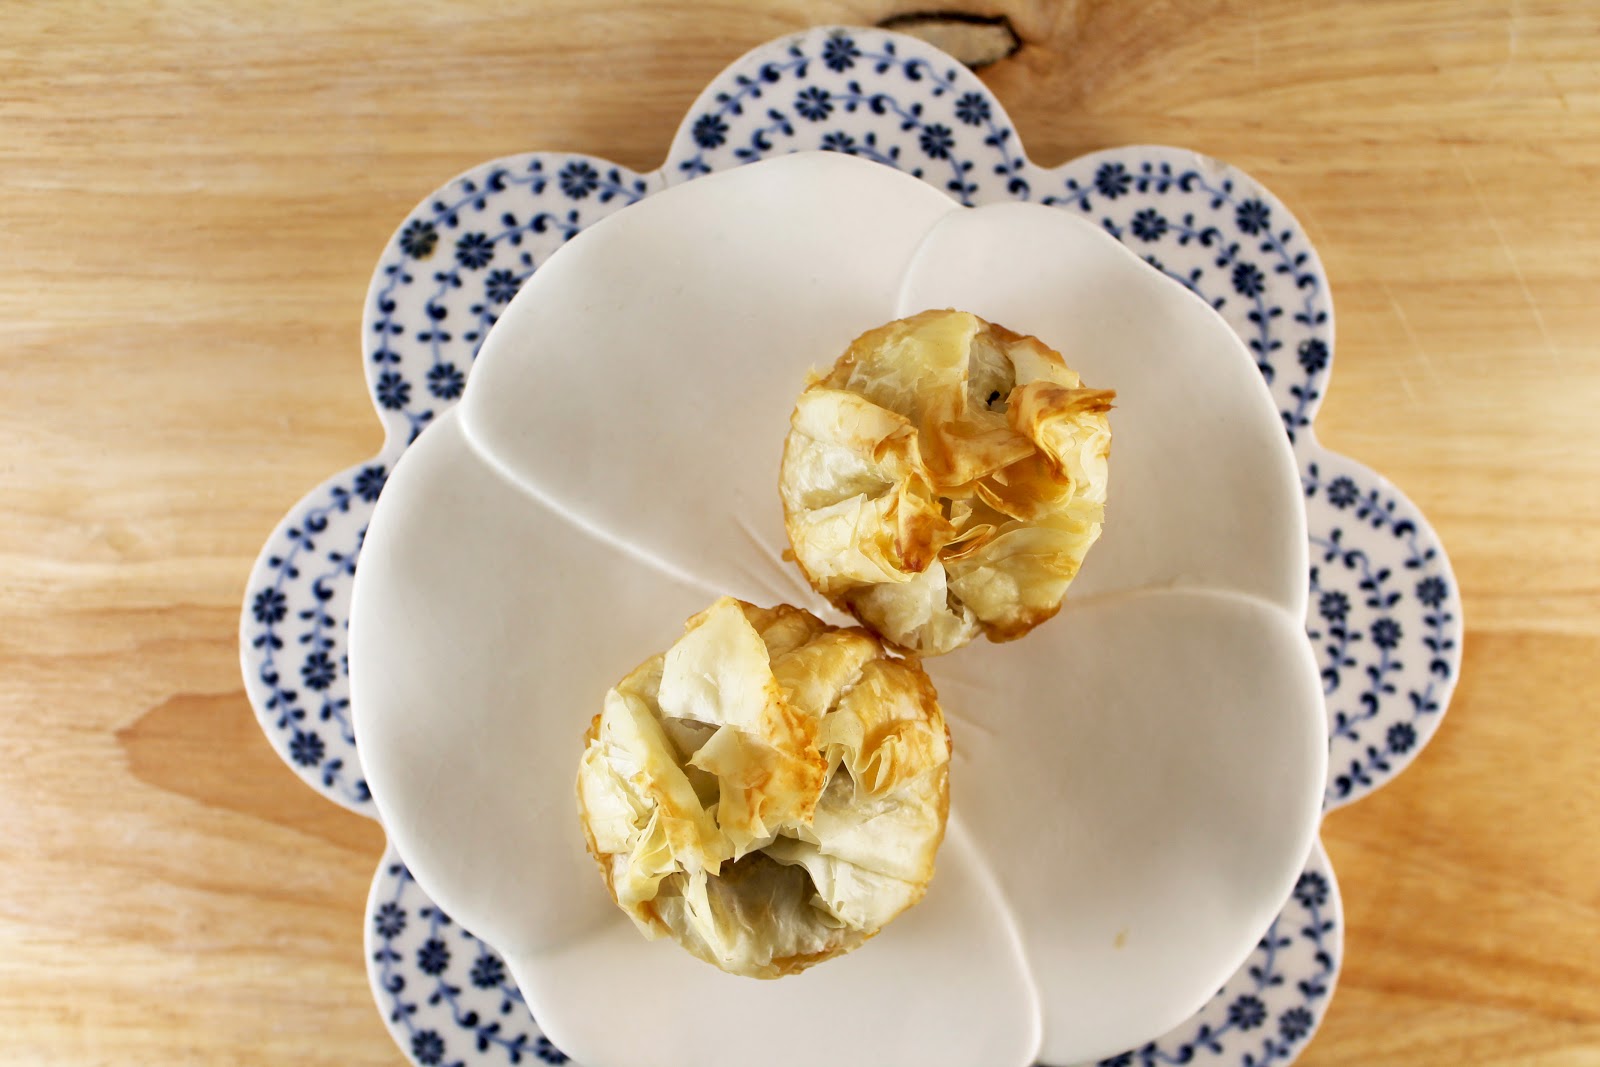
Dried figs, stuffed with honey-sweetened ricotta cheese, wrapped in honey-drizzled phyllo dough.

These are good too, but not as good as that ice cream.
So, like, when's summer?  Cause I have a two ingredient ice cream to make.  a.s.a.p. 
Honey Ricotta Stuffed Figs
  • 16 Dried Whole Figs
  • 1 Cup Ricotta Cheese
  • 2 Tbsp Honey (more or less to taste)
  • 1 Package Phyllo Dough (found in the freezer section)
  • 1/2 Stick of Butter, Melted


Makes 16 Servings (can easily be adjusted to fit your needs)
Preheat Oven to 325F
1) Unfortunately figs are out of season in January, or I might have tried fresh ones (yum!!) or at least
    have been able to pick up a better batch of dried ones.  I found these at a local produce store,
    although I have also seen some at Costco and Trader Joe's (packaged in a bag, rather than a disk).
    The whole point, though, is to have something big enough to cut open and stuff with cheese.
2) Phyllo dough is slightly temperamental, although not as difficult to work with as you may have read. 
    I came into this post knowing absolutely nothing about this stuff and I survived, so you can do it.  I'm 
    going to create a post just on this sometime in the future.  The basics of what you need to know are:  
    a) It's frozen, so it will need to be thawed overnight in the fridge,
    b) It dries out fast, so you need to have everything else ready to go before you start working with it, 
    c) You need to moisten the layers with butter so they don't crack and fall apart, 
    d) You can refreeze anything you don't use. 
3) Cheese stuffing. To be honest, I didn't really measure this out.  It was about 1 Cup of ricotta cheese 
    to 2 Tbsp of honey.  But you may need more or less depending on your taste preferences.  If you 
    start small, you can't mess up.  Just add more as needed.  Stir to combine and set aside.  
4) Fig Time! Arrange each fig so it is full size (in my package they were flattened to save space). 
5) You'll notice there are two ends: a "flat" and a "pointy." Take some kitchen scissors (normal,
    thoroughly washed, scissors work fine) and snip off just the tip of the pointy end. 
6) Now cut the fig down the center leaving the flat end intact.  In other words, don't cut all the way 
    through.  We want the fig to remain in one piece.
7) Adjust the fig so you can cut across the opposite center to create a sort of "X" shape (pictured bottom 
    right corner).  Repeat till all figs are prepared.
8) In a microwave safe bowl, melt butter.  The next step is the dough, so everything needs to be set 
    and ready.
9) Unwrap thawed out phyllo dough.  (FYI, it still needs to be chilled thaw and store in the fridge).  
    Grab 4 layers and wrap the rest back in the package.  You may need more, but since it dries out you
    can only work with one set at a time.  Depending on how large your sheets are, you'll want to cut
    them into approximately 4"x4" squares.  Size doesn't have to be precise, just a reference.  Once you
    do it a few times you'll see if they need to be bigger or smaller.  *Note: You will be working with the
    4 layers together on top of each other, so even though there are "layers" you'll technically only be
    cutting one piece/sheet.
10) Lift the top two layers off the square piece, and with a pastry/basting brush cover the remaining 
      layers in butter.  Place the top layers diagonally over the bottom half and brush these with butter as 
      well.  (The more butter, the more delicious.  I didn't use too much here though.  I kept it light).
11) With a teaspoon, spoon as much of the ricotta mixture into a fig as will fit.
12) Place fig on the prepared phyllo dough square.  
13) Pinch and lift edges of dough around the fig and apply pressure to the top to close. 
14) In a well greased mini-muffin pan (or a flat baking sheet) place figs one by one and the brush tops 
      with butter.  
15) After all of the figs have been stuffed and wrapped, drizzle tops with honey.  Again, here it's to 
      taste.  The more you use, the more sweet and moist (less crispy) the dough will be. 
16) Optional - dust the tops with a sprinkling of salt to help bring out the flavors.
17) If using a mini muffin tin, fill any empty slots with a small amount of water.  This helps the pan to 
      heat evenly.
18) Cover lightly with foil.  I did this so the tops wouldn't brown too quickly or burn in certain areas. 
19) Cook at 325F for 15-20 minutes or until golden brown.  
20) Serve warm.  Leftovers can be stored in the fridge. 
What will inspiration think of next?

-----


Well, how about a Facebook page?
Never miss a post again!  Plus, get extra "baking tidbits."
Like? Uh, yes please!!


------