Showing posts with label white chocolate. Show all posts

Thursday, February 21, 2013

"Birthday Cake" Seven Layer Bars (★ ★ ★ ☆ ☆)

No, this picture isn't dangerous.

Okay, ...it is a little bit.

Okay, I kind of freaked out that the whole thing would tumble over and my lovely light box would burst into flames.

But how else was I supposed to create such a "subtle" foreshadowing?
Anything for art, right?

---------

So besides the November-to-December holiday montage, February is my favorite time of year.

No, not because it's Valentines Day.

Although, I do like the whole "chocolate" binge aspect.

And I'm sure the whole "love" aspect is swell too, but I've had a total of two valentines dates throughout my entire existence so the ratio of Dates on V-day to Not Dates on V-day is none too inspiring.

And it's not even because February is the only month that never reaches thirty days...although, I have to admit that is pretty cool.

Nope those aren't the reasons.

February is my favorite time of year...
...BECAUSE IT'S MY BIRTHDAY!


And this year, I'm closer to thirty than I've ever been.  

So I'm celebrating
...all month long. 
Because I deserve it.

To help you join in on all the festivity and help you get to know me a little better, I thought it'd be fun to answer a few questions about myself.  

The more you know, the more you care, right?       RIGHT?!         right?


Don't blame me for these questions. 
If this is what Google says the world wants to know, then who I am to argue?
I mean, it's Google.  

So without further ado...  (be glad I whittled these down from my original "twenty-six" question idea!)

1. What is your favorite time of the day? 
    Pretty much the parts of the day where my stomach starts to grumble.  Because then it's "sanctioned"  
    chow time!

2. What are you absolutely best at?
    Answering questions about myself!  I'm the best in the world...in the universe!!

3.  If you were a book, which book would you be?
    A book with lots of short chapters.  I hate chapters that go on a hundred pages strong.

4.  Do you know how many pieces of clothing you own?
    The amount where a "one in, one out" rule has become a necessary evil.   

5.  Which song would you rather wake up to in the morning?
     Let's get real, it's Freddie Mercury's..."We are the Champions."  Try not getting pumped to that. 

6.  Aside from Ricky Martin, which artist do you listen to the most?  
     Well since I listen to Ricky Martin, um...., never....I'd have to say every artist in the world.  Even 
     Rebecca Black.  Because even I know that "yesterday was Thursday, today is Friday" and we be 
     "partyin' partyin' yeah!"

7.  If you could have dinner with anyone, who would you choose?
     I think I'm going to have to go with Derek Wills on this one.  *Sigh* ...that salt and pepper hair  
     ...that British accent  ...that seductive-one-moment/rip-you-a-new-one-the-next bad boy quality.  I 
     am taken.

8.  What 3 things would you not take with you to an island?
     Really? Most unproductive question. Ever. But obviously I wouldn't bring 
     1) My new Smash DVD's.  Only because there is no electricity...unless this is "The Island" - from 
         Lost.  Then I'd be A-okay. 
     2) Any of the plants from my backyard.  Because, in my imagination, this island is full of trees and
         tropical flowers so my plants would be redundant and outshone in comparison. 
     3) My cat.  As much as I love him, he'd drive me crazy while I was trying to build a "Robinson 
         Family" worthy treehouse and get an even tan. 

9.  What would you do if you found a wallet and there was no ID in it?
     Bury it.  Honesty prevents me from taking someone's money.  But if I can't have it then neither can 
     you!

10. How different would your life be if you were to live in Africa?
      Pretty different.
Since we're totally close now - I opened up so much! - I feel we can appreciate what happened in my kitchen this past week even more.

Seven Layer Bars.
Birthday Style.

And I'm not talking your normal "seven-layers-actually-translates-to-seven-ingredients" bars - I'm talking

Count em', Seven...


1 - Golden Oreos
2 - Funfetti Cake Batter
3 - Marshmallows
4 - White Chocolate
5 - Semi-sweet Chocolate
6 - Coconut
7 - Sprinkles


....Layers.

Sticky Sweetness.


Birthday Cake Seven Layer Bars
Inspired by The Domestic Rebel

  • 1 Cup of Golden Oreos, Crushed with Cream Removed
  • 3/4 Cup Butter (1 1/2 Sticks), Divided
  • 1 Box Funfetti Cake Mix
  • 1 Egg
  • 3/4 Cup Marshmallows
  • 1/2 Cup White Chocolate Chips
  • 1/2 Cup Semi-Sweet Chocolate Chips
  • 1 Cup Flaked Coconut
  • 1 - 14 oz Can of Sweetened Condensed Milk
  • 1/3 Cup Multicolored Sprinkles

Needed a 9x13in pan
Preheat oven to 350F Degrees
Makes Approx. 20 Bars

1) Gather all the ingredients together.  These bars are easy, but there are a few steps because of all the
    different layers.


2) Separate Oreo cookies from the creams.  I bought the Birthday Cake variety, but once you remove 
    the cream there isn't much difference between these and the standard Golden.  
3) Finely crush the Oreo cookies until you get a cups worth of crumbs.  This is about 3/4 the package.  
    Start with a meat tenderizer or a Ziploc bag and your hand to make the crumbs.  If you need them 
    finer place into a food processor or, if you are lazy like me, a cleaned coffee grinder. 
4) Place 1/2 stick of butter (1/4 cup) into the bottom of a 9x13in pan.  Let it melt in the oven.  
5) Add Oreo crumbs on top of the melted butter and pat down gently.

6) In a medium bowl, combine funfetti cake mix, egg, and rest of the butter (melted).  
7) Take pieces of batter, flatten them in your hand and add to oreo cookie base.  Make sure the entire 
    bottom layer is covered.  Add these gently as you don't want to disrupt the crumb crust.
8) Bake in the oven for 10 minutes.
9) Carefully remove slightly baked cake/oreo layers and add marshmallows.


10) Add white chocolate chips, semi-sweet chocolate chips, and cocount. 
11) Pour can of sweetened condensed milk over the entire thing.  Make sure everything gets covered. If    
      you can do with less than a can then stop there.  The less you have to use the better.  It's really, 
      very sweet.
12) Disperse sprinkles across the top. 
13) Bake for 15-20 minutes, until the top begins to get golden and bubbly.  Remove from oven and 
      cool completely on a cooling rack before cutting into pieces.  

Happy Birthday to me!


----------------------

Oh my goodness!  Thanks so much for viewing.  These were featured during The Back For Seconds Link Social on March 5, 2013 and Blooms Designs Link Party on March 6, 2013.  Click the icons to check it out!!!


Also featured on:


Friday, February 1, 2013

Double Chocolate Cereal Cookies (★ ★ ★ ☆ ☆)


I don't know that I've ever related to a cookie more.

You see for the past month, I've been doing two people's jobs.  

Worn two (though similar) hats...
Tried to maintain the quality of my work along with the person's that I am covering for...
Dropping one to pick up the other...

And what does it result in?

Adequate performance.
Nothing crumbling to pieces.
Nothing amazingly praiseworthy.

Okay, enough of the business-y jargon,
Bascially, two people doing two jobs are better than one. 
And when thinking of how to describe these beauties, I couldn't help but notice the parallel.

These cookies, while salivating-ly gorgeous (am I right?!?), were trying too hard to be too many things to too many people.

And by no one's fault but my own.

It all started with a looming leftover box of Chex cereal from my Muddy Buddy Cookies.

Stupid Safeway, only had the ginormous box.
No one likes Chex that much.  
...it's not chocolate  
...there are no marshmallows  
...it's not chocolate 
...I didn't get the honey coated kind.  
...it's not...well, you know.              
[chocolate] couldn't help myself

Anyway, I bake too much to just throw stuff away.
Waste not, want not. 

So this remaining box of cereal just sat....for months...in my baking bin.
Until one fateful morning, when this morsel appeared in my inbox Chocolate Covered Cheerios.

How good do those sound????  And then the lightbulb  - *bling*

Chocolate covered Chex.
In a cookie.
A White Chocolate cookie.
With Chocolate Chips.

Ya, ya.  That sounds about right.
Only, it wasn't "about right."

It was "about" okay.

I was a little overzealous in my Chex adding.
Like, I just went for it.  
Waste not, want not remember?

And then my "white chocolate" batter just plain didn't work.
It should have dawned on me that this might be an issue when I couldn't find a recipe for white chocolate batter...anywhere...ever.  
I decided to melt white chocolate chips and add them to the batter.  

Easy, right?  

Only there is this interesting thing about chocolate chips - they don't like to be melted and runny...they like to be solid and together.  
So instead of white chocolate cookie dough, I had cookie dough with the tiniest, most minuscule white chocolate "flecks" splattered throughout.

I mean, these weren't terrible.
...But neither am I at juggling two jobs.

It's just, these weren't amazing...in fact, they were, dare I say, slightly disappointing.
...and well, I'm guessing you can fill in how I feel about the "job" part in this equation. 

So even though I'm about to spend a good chunk of time typing out the recipe below...I can't, in good conscience, rave and recommend making these.  At least, not without some tweaks.  

Like maybe only putting a cup of crunchy cereal...you know, instead of three.

And if that doesn't appeal to you - there are pictures.
Double Chocolate Cereal Cookies
[i.e. White Chocolate Cookie Dough, Chocolate Drizzled Chex, White and Semi-Sweet Chocolate Chips]
adapted and inspired by The Better Crumb & Cookies and Cups

  • 1 Cup Chex Cereal
  • 1 1/2 Cup Semi-Sweet Chocolate Chips (Saving 1/2 Cup for later)
  • 2 1/2 Cups Flour
  • 1 tsp Salt
  • 1 tsp Baking Soda
  • 12 oz Bag White Chocolate Chips (Saving 1/2 Cup for later)
  • 1 Cup Butter
  • 1/2 Cup Packed Brown Sugar
  • 2 Eggs
  • 1 tsp Vanilla
Preheat Oven to 325F Degrees
Cook Time: 8-12 minutes
Makes Approximately 20 Cookies
How to Make Chocolate Drizzle
1) Melt 1 Cup of Chocolate Chips in a microwave safe bowl, or a double boiler.  Let cool to almost
    room temperature. (The chocolate will be very hot and may burn you or melt the plastic bag we are
    going to place it in).
2) Once cooled, place melted chocolate into a ziploc bag.
TIP: I like to flip the bag inside out, pile the chocolate on the "inside" part of the bag, then flip it back
         right-ways in.
3) Just slip your hand into the middle of the bag while inside-out, cradle the chocolate with your hand
    and carefully pull the sides of the bag around it until the chocolate is now on the inside.  I do this to
    help keep the chocolate in one general area instead of sloppily spooned all over the bag.
4) Press all of the chocolate into one corner, twisting the top of the bag until a little "triangle" of
    chocolate is formed and packed.  Cut the tip of the corner with some scissors.  The smaller the
    opening the smaller the drizzle lines.
[NOTE]: After making these cookies, I found this "drizzle" step to be obsolete as the Chex just gets
               crumbled all to heck in the batter.  I'd skip this and save a good chunk of time.  Crushed
               Chex with white and semi-sweet chocolate chips is "chocolate covered" enough for me.  If  
               however, you want to take the time to hand dip each and every one...then more power to
               you.  Or, you can throw the Chex into a bowl with the melted chocolate and get them
               covered that way.  I recommend either of these options to the "drizzle."
5) If continuing on with the Chex drizzle: Lay out Chex flat on a baking sheet lined with parchment
    paper.  Drizzle chocolate over the tops.  Place in the fridge until chocolate sets and is firm to the
    touch.
6) In the meantime, you can start making the batter.  In a medium sized bowl, mix together flour, salt
    baking soda. Stir and set aside.
7) In a microwave safe bowl or double boiler melt white chocolate (set aside 1/2 cup of the chips for
    later). Let melted chocolate cool to almost room temperature. (We will be adding the butter next and
    we don't want it to melt).
8) Add cooled (but still melted) white chocolate to a medium sized bowl.  Add butter, cut into cubes.
    (This recipe doesn't call for softened butter so in order for it to mix well, it needs to be cut to a more
    manageable size).  Beat until combined and smooth.
9)   Add brown sugar, and combine.  
10) Next beat in the eggs, one at a time.
11) Add vanilla.  Next, add dry flour mixture a little bit at a time until thoroughly combined.
12) Here is where you add the Chex, and remaining 1/2 of white and semi-sweet chocolate chips that 
      you set aside.  I suggest adding the Chex 1st if you'd like them to be in smaller pieces, and 2nd if 
      you'd like them to be a little larger.  I added my 1st so I still had to add the chocolate chips.  By 
      the time I was done adding and mixing, I couldn't even see the Chex pieces anymore.  
13) Ideally, any batter will be chilled overnight, but if you don't have time it's not required here.  Place 
      heaping teaspoonfuls on a greased baking sheet and cook until "just done" - about 8-12 minutes. 
      Slightly golden and puffed, but not thoroughly set.  They will continue to cook on the baking sheet.  
      Leave on the sheet for 5 minutes before moving to a cooling rack 
TIP: If you want to make these larger, you can.  I did for these pictures - and I liked them better that 
        way.  You will just have to adjust the time accordingly.  Also, because of the Chex, these cookies 
        don't spread well in baking, so you want to slightly flatten them out before baking - especially the 
        larger cookies.
Sure these "goodie goodies" didn't quite live up to their expectations,
But, in this case, I have to say:
Some cookies
Are better than none cookies at all.


Thursday, December 6, 2012

Gingersnap Magic Cookie Bars (★ ★ ★ ★ ☆)


Why don't you go ahead and settle in, grab your morning coffee,  because I want to tell you a little story.

A little story called "Why My House Isn't Safe For Magic Cookie Bars: Or Anything With Copious Amounts of Sugar."

So the title's a little excessive.
But it's my story.
And I think it's perfect.

I honestly contemplated changing the names in this because my family might kill me, but where's the fun in that?

Plus, after reading about Person 1, Person 2, Person 1 again, then Person 3...you're just going to get all confusl'd.

So since I'm going there, let's just lay it all out right now.

Mom,
          Dad,
                  Bestie

Prepare to be famous.

Brother - You are safe.  You don't like coconut.
So I'm baking Monday night, pretty much the usj.

Nothing too interesting there.  Except that everyone was home.  [Dun, dun, dun, duuuuuuuuun].
I'm used to having the house to myself on baking nights.  Just me, an iPod, and an electric mixer.

See when you are alone there are baking pros and cons.

The Cons.

  • You are lonely

That's it.

The Pros.

  • You are lonely so you can focus and do your best baking.
  • You are lonely so you get to listen to your music as loud as you want (and dance around while belting out Mariah Carey Christmas songs into a wooden spoon.  Not that I do that...just the "option" is there).
  • You are alone so you can tweak any recipe to your heart's content.
  • You are alone so you can taste test something fresh from the oven without swarms of "sugar deprived" eyes glaring back at you.  

Three hungry people, one blogger.
There's bound to be conflicts of interest.

Bloggers have a different mindset.
We don't bake to eat.
Well, ultimately we do, but not before our desserts have paid their dues.
Prepping, styling, photo shoots, etc.

Much to the chagrin of my family members.

---

So back to the story.  I take the bars from the oven.  Not two minutes after I settle down to watch a Christmas movie, do I hear the terrifying sound of a knife slicing into melted chocolate and toasted coconut shreds.

Bakers can totally hear that kind of stuff. 

Now, I'm not against sharing.  I understand I have infused the house with an irresistable aroma. But I worked hard on those cookie bars.  The idea.  The shopping.  The baking.  The documenting.  After all is said and done every post costs me about 8 hours of free time...so I'm none too thrilled by the sound of my hard work about to be mutilated at the hand of someone other than me.

Me: "Nope." 
Dad: "You serious?"
Me: "Yep."
Dad: [Insert crazy pout.  Like I just told him I think going to college is a waste of time.]

Sure he's my dad.  He's only sacrificed everything for me.  But I still like to have the final say in what happens to my baked goods...and when.  Call it my controlling "vice," but I'm not ready to give it up. 

Twenty minutes later, after the cookie bars had cooled the "proper" amount of time, it was time to slice and share.  But only a taste, because these babies still had work to do.

Mom and Bestie were beside themselves and promptly consumed their share.
But Dad, nope.  He was good.  The moment had past.  
On his terms, or no terms.  Like Father, Like Daughter.  

Suddenly, an even bigger dilemma than I could have ever predicted arose - There was one piece and two willing participants.  

I mean the obvious, reasonable thing to do would be to share, right?
And that's what happened.

Until my Mom convinced Bestie to refrigerate the "precious" morsel because it would "taste better."  I walked into this:

Mom: "I'm so sorry.  I ate the whole piece.  I couldn't stop myself."
Bestie: [Insert Stunned Silence.  Cue welling of tears.]
Mom: "When Natalie goes to bed, I'll cut you another one."
Bestie: "Wait.  You really ate the whole thing?"
ME: "Excuuuse me?"
Mom: "No, I'm just kidding. I only moved it to the door."
Bestie: [Insert pent up chuckle].
ME: "...Uh, what was that about me going to sleep?"  

No joke, totally had a nightmare that I woke up to find 4 measly pieces.
Me: "What the heck happened?!"
Mom: "I'm so sorry.  They were just so good!"
Me: "I still had to take pictures!!"

I breathed a sigh of relief when I found the pan safe and sound, pristinely wrapped on the counter in the morning.  But did that stop me from hiding that dish in the tupperware cupboard?  

No.  
No, it did not.  
Gingersnap Magic Cookie Bars
adapted from Love from the Oven

1 Stick of Butter (1/2 Cup)
1 1/2 Cup Gingersnap Crumbs
1 - 14 oz. Can Sweetened Condensed Milk
2 Cups Nestle Holiday Chips (or 1 Cup Semi-Sweet and 1 Cup White)
1 Cup Chopped Walnuts (Pecans work well too)
1 1/3 Cup Flaked Coconut

Needed: 9 x 13in Pan
Preheat Oven to 325F Degrees
Cook for 25-35 Min
Makes Approx. 24 Bars

1) Crush gingersnaps into fine crumbs.  I used a meat tenderizer and a coffee grinder to finish up the 
    job.
2) Preheat oven to 325F Degrees.  Place cube of butter in 9 x 13in pan and place in oven to melt while 
    preheating.  Check every few minutes to make sure it is melting and not getting burned.
3) In the meantime, chop up a cup of nuts.
*Suggestion: I LOVE crust.  And I found this recipe to be a little on the thinner side.  What I would 
                      do next time is increase the butter to 1 1/2 cubes and double the cookie crumbs.  Or do 
                      1 Cup Gingersnaps, 1 Cup Graham Crackers.  Grahams are a lot sweeter and less spicy.  
4) Once butter is melted, remove from oven and place on heat safe surface.  Sprinkle cookie crumbs 
    evenly over the butter and gently pat down with the back of a spoon.  Make sure the entire bottom 
    surface is covered.
5) Pour can of condensed milk over the crust layer.
6) Next add 3/4 Cup Nuts, and 1 1/2 Cup Chocolate Chips (saving some for the very top layer).
7) Sprinkle the coconut evenly over the nuts and chocolate.  Pat down gently.
8) Top with remaining nuts and chocolate chips.
*Suggestion: I've made these before and "pre" toasted the coconut.  I wish I had done that this time.  I 
                       love the toasty smell and taste of the coconut after it's been baked for awhile. If you want 
                       to pre-toast the coconut, line a baking sheet with foil and spread the coconut thinly 
                       across.  At 350F, bake for no more than 5 mins.  Watch carefully that these do not burn.  
                       You want to see the edges of the flakes just beginning to darken. 
9) Bake for 25-35 minutes.  Top should be slightly browned.  Remove from oven and place on cooling 
    rack.  Allow to cool completely before cutting and serving. 
Do not think me cruel. After these pictures, my family had their fill.  
All Tuesday night, they ate to their hearts content.
Then came Wednesday. And I brought the rest to work.
So Bestie cried.  

Oh geeze. 


Thursday, November 29, 2012

Simple Peppermint Bark (★ ★ ★ ★ ☆)

Today I'd like to talk about experimentation and making assumptions.

Because apparently, I have a major problem with both.  

Apparently, I think I'm the Baking Queen of the Universe.  
And that everything that develops in my pretty little head is sure to emerge from the oven to the sound of an angel's chorus.

And apparently, I assumed I knew enough baking basics to be able to double up a batch of brownies by simply adjusting the temperature and time.

Apparently, I was wrong. 
Here are just some of the sad pictures I took of the "Peppermint Bark Brownies," I concocted this week.
1) The obligatory "ingredients" shot
2) The artsy "look at my cool photo skills" shot of crushed candy cane pieces
3) The anticipatory "pre-oven" shot
4) The "I'm-such-a-dork-for-taking-all-of-these-photos-and-seriously-having-no-reservations-about-
    baking-two-batches-of-brownies-in-one-pan-or-mixing-up-a-mint-cream-cheese-layer-that-was-
    suspiciously-watery" photo

Needless to say, they did not turn out.

Unless, you consider a rock hard burned "crust" layer, an overly browned "cream" layer, and a goopey, soupy center, a delectable treat.

That'd be like that Gilmore Girls episode where Luke brings Lorelai a batch of brownies that he accidentally dumped triple the amount of cocoa in because he knew only she possessed such a superhuman chocolate tolerance...that, and he wanted her to let his punk nephew study with her angelic daughter...oh, ya, and he was secretly in love with her.

Ya, just like that.
Only not at all.
I'm just obsessed with the Gilmore Girls.

And with Peppermint Bark.
So obsessed that when my original idea failed, I switched to the tried and true.  

Simple.  Easy.  Plain ole'.  Peppermint Bark.

And ate half the sheet by myself.  In two days.  
Simple Peppermint Bark
adapted from Savory Sweet Life

1 Cup Chocolate Chips
1/2 tsp Peppermint extract
1 Cup White Chocolate Chips
3 Candy Canes, crushed

Makes one small 7x11 pan (Double the recipe for a 9x13)
Parchment or wax paper for lining the pan
Approx. 40 Minutes Chill Time
 1) In a microwave safe bowl, heat 1 cup of semi-sweet chocolate chips in 30 second increments.  Stir
     well between heatings.  You want them to be just melted, not boiling hot.
2) Add 1/2 tsp of peppermint extract, stir well.
3) Line pan with parchment paper and spread chocolate evenly into the bottom.
*Tip: You can spray a spatula with Cooking Spray to keep the chocolate from sticking.
Note: I did not line my pan with parchment paper.  I paid the price.  Assumption #348: "I can make
          simple peppermint bark without thoroughly reading through the recipe."  Getting peppermint
          bark out of a greased-only pan has a 76% success rate.  Get parchment paper, wax paper, I don't
          care!  Line. that. sucker.
4) Place in the freezer for about 15 minutes.
5) In a ziploc bag, crush candy canes into very small pieces.  A meat tenderizer works well.
6) Heat 1 cup of white chocolate chips in the same manner as before and spread on top of the slightly 
    hardened chocolate layer.  Spread quickly as the bottom layer will begin melting and mixing.  
7) Sprinkle crushed candy cane pieces across the top and lightly press down to make sure they get in 
    the chocolate.  Do this quickly.  You'd be surprised how soon some areas harden because the pan 
    is cold.
8) Place pan in the freezer until completely set.  At least 30 minutes.
9) Once set, take the parchment paper out of the pan and peel off of the bark.  Break into pieces using a 
    large knife.  
 Because before you can build a fire, you learn to light a match.
And before you make boxed brownies you...
Oh.  Wow.  

Blame it on the hah hah hah hah hah holidays?


Thursday, November 8, 2012

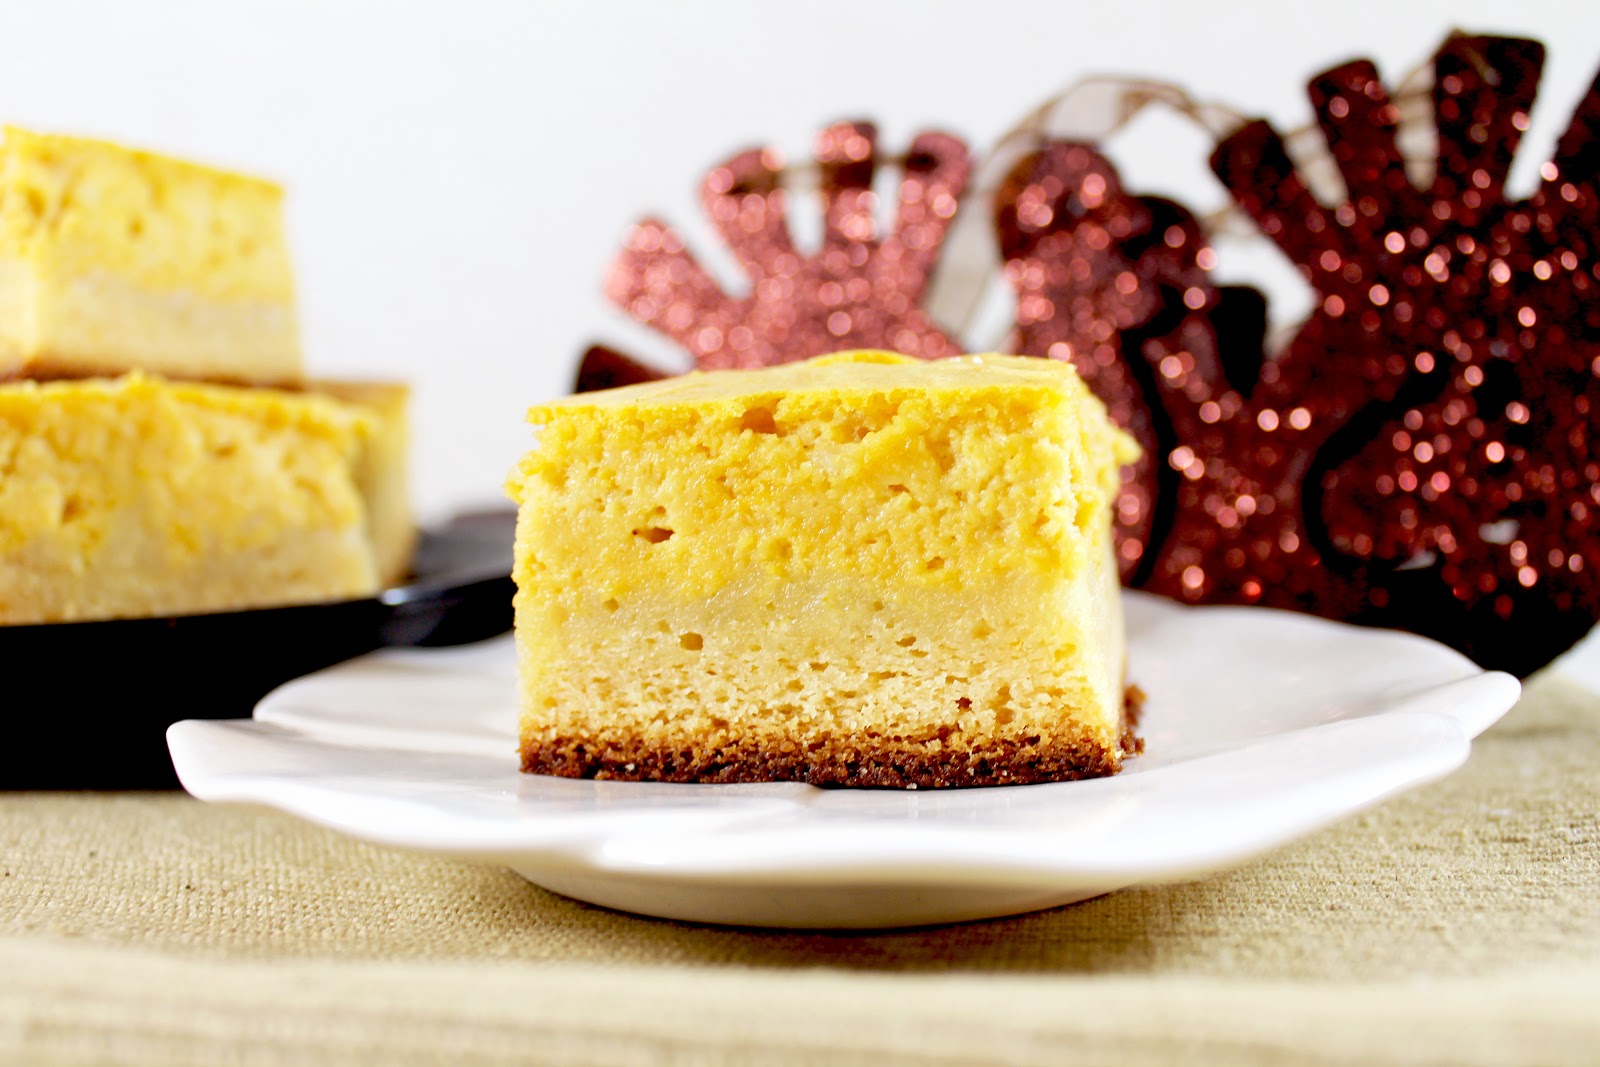
Pumpkin Cheesecake White Chocolate Brownies (★ ★ ★ ☆ ☆)

"Hey, uh, did you know your title is a mouthful?"
Um, ya, I did.  Sorry about that.
"Oh, oh no problem.  But it's just really long...borderline tongue twister.  My two year old couldn't even repeat it back to me."
...uh ...  Sorry?  ...mm ...  You probably shouldn't be feeding these to your two year old.  Maybe start with something more simple - like cheerios ... -and counting to 5?

Yes, readers.  That WAS random. 

But so was how this "thing" (bar...brownie...whatever you want to call it) happened.

I made these the same day as my Pumpkin Truffles.  I was, honestly, just trying to get rid of the rest of the canned pumpkin I had and this is what happened.

It was like the "Attack of the Living Baked Goods" night in my kitchen. 

-----

I have to back track a little bit.

October was the month of the pumpkin.
Pumpkin patches, pumpkin carving, pumpkin ice cream, pumpkin donuts, even pumpkin cereal.

Now don't get me wrong, I'm as "over the moon" excited as the next guy about Pumpkin Spice Lattes at Starbucks...but those are in September. When the novelty hasn't worn off.

In September, blog posts like this seem fun, light-hearted and fresh. (Okay it still kind of excites me...but that's beside the point!).

I became the Pumpkin Grinch.

I follow a lot of baking blogs and every one, every day was offering me some other shade of pumpkin.
Muffins, ganache, whipped cream, butter, foot scrubs, and toothpaste were presented to me on a big fat pumpkin platter.

And like all things, it seems good at first...
Oh yeah!  Ideas for fall baking!
But eventually we reach that "special" point.  The one I like to call "overboard."
Suddenly, what once used to bring me joy, now was just plain annoying. 

I was annoyed at having to see the same color food every day.
Annoyed that I had to think about pumpkin in ways I'd rather not - pumpkin seed guacamole??
But mostly I was annoyed that everyone had caught the pumpkin train, but me.  The market had been saturated.  Closed. Full.  Done.    

Okay, I was bitter and jealous!

I couldn't stand another pumpkin recipe, so I grumpily swore I would find "other" more "interesting" things to bake.  

But who am I kidding?  

It's November.  It's fall.  Thanksgiving is near.  
Now's the time we all start dreaming in pumpkin Technicolor.  

My intention was to only do one pumpkin recipe - because I had self-control - but like I told you, my kitchen had a mind of its own.  
The truffles took all of a measly third of a can of pumpkin. 
What on earth was I going to do with the rest?

Being a regular baker, I:
1) Hate wasting things I spent money on and
2) Enjoy double backing my baking efforts. (Bake two similar things in one night means no more baking for the week!)

After the whole truffle "ordeal," I wanted to make something that was drastically easier and a little more my forte - enter the brownie/bar.

I suddenly had visions of pumpkin cream cheese swirl atop a fudgey brownie.  But not a chocolate brownie...oh no - been there - done that.  Pumpkin and chocolate do NOT mix.  Don't argue with me, it's a fact. 

Sure that pumpkin pancake with chocolate chips tasted fine, but how many chocolate chips were in there?  5?  Ya, you act like it's chocolate and pumpkin, but it's really not.  That's the kind of thing you do to your cat when he needs to take medicine.  I'll just crunch a little in his food.  Mix in a couple treats and voila!  Medicine that no longer resembles medicine!

Enter: White chocolate.
Oh that glorious, fatty, un-chocolatey chocolate.
That would go stupendously with pumpkin!

I tore through my pinterest page, and found the white chocolate brownies I had been dying to try.
The stage was set.
But my own eagerness got in the way.

In my attempt to finish off the entire can of pumpkin, I doubled the cream cheese recipe thinking nothing of it.  I'll just have to cook it a little longer.  Sound familiar? (Cake in A Jar, anyone?)

Of course, this is not so. I had to cook them so long that the bottom got a little too brown and the top never quite set all the way. 

But for once, my own independence did not fail me.  Sure the texture was a little off (I fixed the proportions in the recipe below so you can make amazing, sanely proportional P.C.W.C. Brownies), but they tasted pretty good. 

I'm very critical of my baking, but just to paint you a picture of how good these are my mom kept RAVING about these. 
I mean RAVING.
This is the same mom who rolls her eyes every time I tell her I'm going to "veer" from a recipe.
The same mom who looks at me with the perfect amount of disapproval and acceptance of the fact that I'm an adult, when I come home with a huge bag of Hot Cheetos, Animal Cookies, and Thai Bubble Tea and tell her I'm going to go watch a movie.

Ya, that mom.
That mom ate half the batch.
And that's gracious estimating right there.
Pumpkin Cheesecake White Chocolate Brownies (or P.C.W.C.B for short)
adapted from  Nook and Pantry

White Chocolate Brownie Base
  • 1/2 Cup of Butter
  • 5oz. of White Chocolate Chips (Use Nestle)
  • 2 Eggs
  • 5 Tbsp Sugar
  • 1 tsp Vanilla
  • 3/4 Cup of Flour
  • 1/2 tsp of Baking Powder
  • 1/4 tsp of Salt

Pumpkin Cheesecake Top
  • 8oz of Cream Cheese (Use the Block Type)
  • 2/3 Cup of Sugar
  • 1 1/2 tsp of Vanilla
  • 1 Egg, plus one yolk
  • 2/3 Cup Canned Pumpkin Puree

Preheat oven to 325F
Makes approx. 15 good sized brownie/bars
 Brownies:
1) Measure out 5oz of white chocolate chips.  You can also use chopped white chocolate if you'd like.
    I bought Ghirardelli, but I was pretty disappointed in the texture.  I've only ever eaten Nestle White
    Chocolate before.  Of course, I figured Ghirardelli would be the best of the best, but I won't be
    buying this brand again...at least in white chocolate chips.
 2) Get 1/2 cup (one stick) of butter and cut into small pieces to help it melt faster.
 3) Melt the white chocolate and butter in a double boiler, stirring frequently.  Take off heat when just
     completely melted.  (You can use a microwave instead.  Just start with 1 minute then continue
     with 15 second increments until just melted.  Stir well between each heating).
 4) In a medium sized bowl, beat eggs and sugar together.
 5) Beat until fluffy...almost "meringue" like.  Add white chocolate mixture.
6) In a sifter add flour, baking powder, and salt.  Sift over the wet ingredients, mixing occasionally in-
    between adds.
 7) Add vanilla.
 8) Put into a greased 8in x 11in pan (you can use the standard 9in x 13in pan, but just remember they
     will be thinner and will need to cook less).
 Cheesecake:
A) In a medium sized bowl, mix together cream cheese, sugar, and vanilla.  Beat until fluffy.
 B) Add eggs, mix well.
 C) Add pumpkin, beat until just combined.  Pour mixture on top of white chocolate brownie base.
     *Optional: Take a knife and "cut" criss-crosswise the brownie/cheesecake batter in the pan.  This
     will mix some of the elements together and create a "swirl" design on top.  However, because the
     white chocolate and pumpkin are both pale colors the distinction will be slight.  Also if you don't do
     this, the brownie part will be more of a crust instead of a sort of "mixture."  Either way works.  I cut
     mine across a few times, but it didn't work too well as you can tell by the two layers clearly shown    
     in the pictures.
  D) Bake in oven at 325F for about 35 minutes or until cheesecake top is set.  You can test this by
       inserting a toothpick two inches from the edge.  It should come out relatively clean, with no wet
       batter.

[Cue music]
Drea-ea-ea-ea-eam, dream, dream, dream
I love you so and that is why
Whenever I want you, all I have to do is
Drea-ea-ea-ea-eam, dream, dream, dream