Showing posts with label cream cheese. Show all posts

Thursday, November 8, 2012

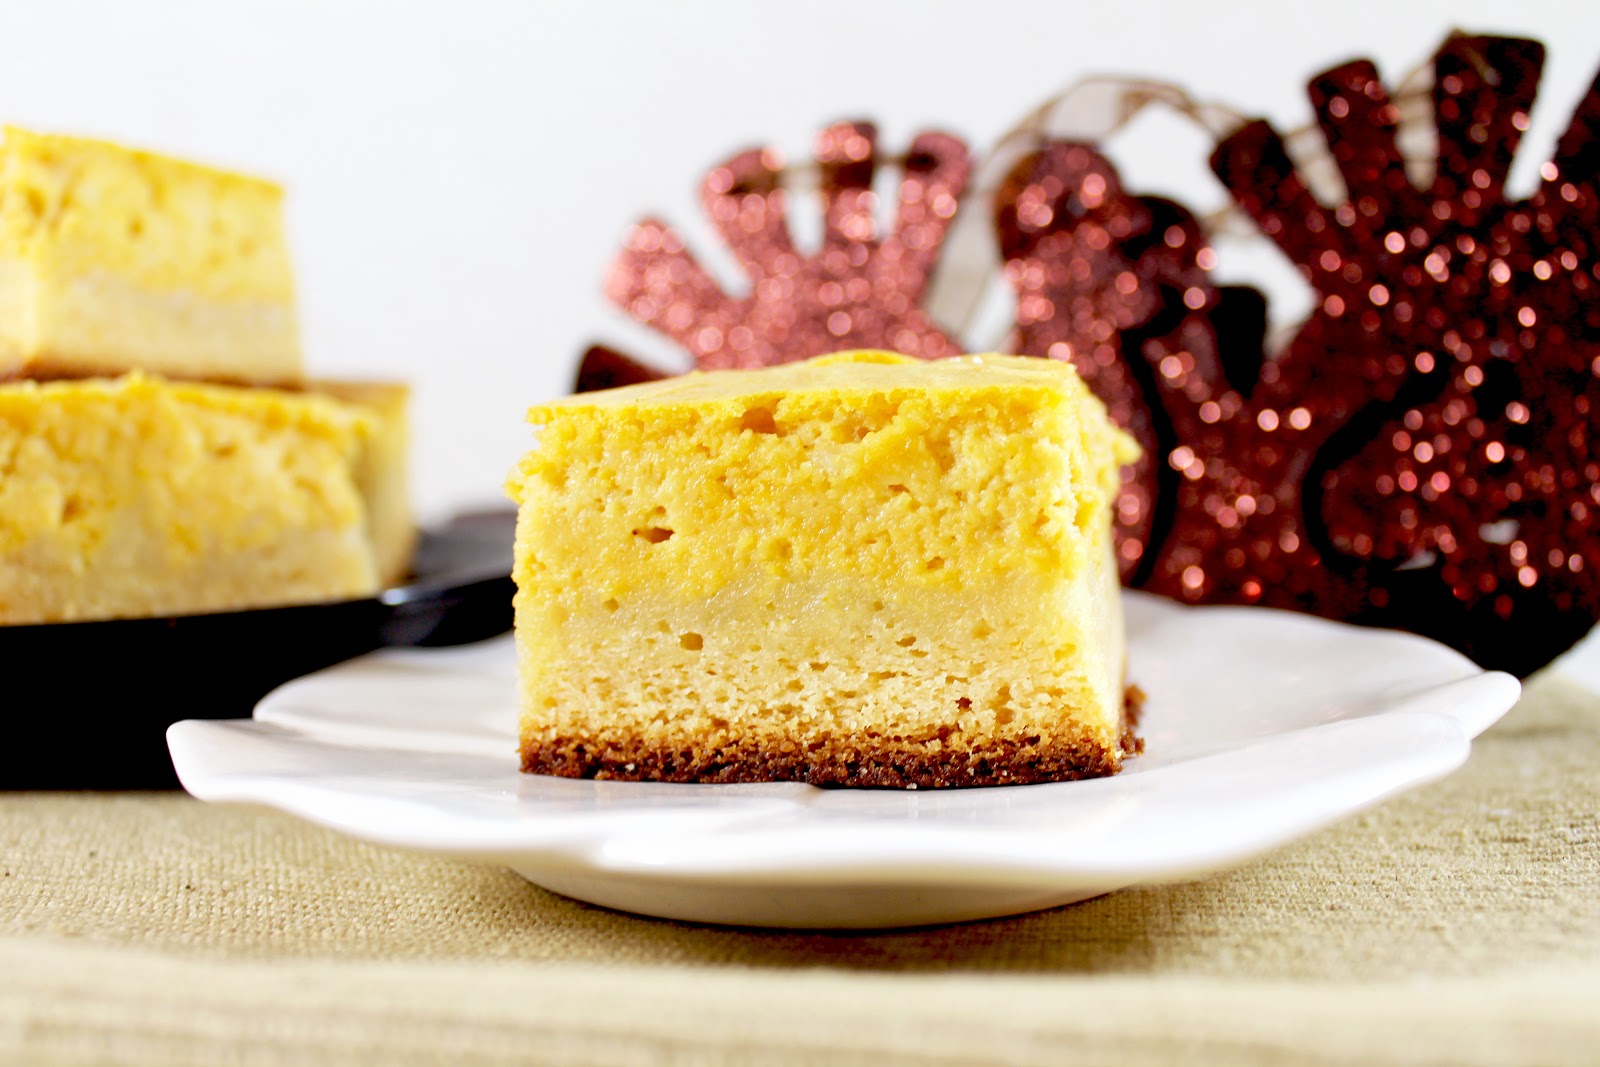
Pumpkin Cheesecake White Chocolate Brownies (★ ★ ★ ☆ ☆)

"Hey, uh, did you know your title is a mouthful?"
Um, ya, I did.  Sorry about that.
"Oh, oh no problem.  But it's just really long...borderline tongue twister.  My two year old couldn't even repeat it back to me."
...uh ...  Sorry?  ...mm ...  You probably shouldn't be feeding these to your two year old.  Maybe start with something more simple - like cheerios ... -and counting to 5?

Yes, readers.  That WAS random. 

But so was how this "thing" (bar...brownie...whatever you want to call it) happened.

I made these the same day as my Pumpkin Truffles.  I was, honestly, just trying to get rid of the rest of the canned pumpkin I had and this is what happened.

It was like the "Attack of the Living Baked Goods" night in my kitchen. 

-----

I have to back track a little bit.

October was the month of the pumpkin.
Pumpkin patches, pumpkin carving, pumpkin ice cream, pumpkin donuts, even pumpkin cereal.

Now don't get me wrong, I'm as "over the moon" excited as the next guy about Pumpkin Spice Lattes at Starbucks...but those are in September. When the novelty hasn't worn off.

In September, blog posts like this seem fun, light-hearted and fresh. (Okay it still kind of excites me...but that's beside the point!).

I became the Pumpkin Grinch.
I follow a lot of baking blogs and every one, every day was offering me some other shade of pumpkin.
Muffins, ganache, whipped cream, butter, foot scrubs, and toothpaste were presented to me on a big fat pumpkin platter.

And like all things, it seems good at first...
Oh yeah!  Ideas for fall baking!
But eventually we reach that "special" point.  The one I like to call "overboard."
Suddenly, what once used to bring me joy, now was just plain annoying. 

I was annoyed at having to see the same color food every day.
Annoyed that I had to think about pumpkin in ways I'd rather not - pumpkin seed guacamole??
But mostly I was annoyed that everyone had caught the pumpkin train, but me.  The market had been saturated.  Closed. Full.  Done.    

Okay, I was bitter and jealous!

I couldn't stand another pumpkin recipe, so I grumpily swore I would find "other" more "interesting" things to bake.  

But who am I kidding?  

It's November.  It's fall.  Thanksgiving is near.  
Now's the time we all start dreaming in pumpkin Technicolor.  

My intention was to only do one pumpkin recipe - because I had self-control - but like I told you, my kitchen had a mind of its own.  
The truffles took all of a measly third of a can of pumpkin. 
What on earth was I going to do with the rest?

Being a regular baker, I:
1) Hate wasting things I spent money on and
2) Enjoy double backing my baking efforts. (Bake two similar things in one night means no more baking for the week!)

After the whole truffle "ordeal," I wanted to make something that was drastically easier and a little more my forte - enter the brownie/bar.

I suddenly had visions of pumpkin cream cheese swirl atop a fudgey brownie.  But not a chocolate brownie...oh no - been there - done that.  Pumpkin and chocolate do NOT mix.  Don't argue with me, it's a fact. 

Sure that pumpkin pancake with chocolate chips tasted fine, but how many chocolate chips were in there?  5?  Ya, you act like it's chocolate and pumpkin, but it's really not.  That's the kind of thing you do to your cat when he needs to take medicine.  I'll just crunch a little in his food.  Mix in a couple treats and voila!  Medicine that no longer resembles medicine!

Enter: White chocolate.
Oh that glorious, fatty, un-chocolatey chocolate.
That would go stupendously with pumpkin!

I tore through my pinterest page, and found the white chocolate brownies I had been dying to try.
The stage was set.
But my own eagerness got in the way.

In my attempt to finish off the entire can of pumpkin, I doubled the cream cheese recipe thinking nothing of it.  I'll just have to cook it a little longer.  Sound familiar? (Cake in A Jar, anyone?)

Of course, this is not so. I had to cook them so long that the bottom got a little too brown and the top never quite set all the way. 

But for once, my own independence did not fail me.  Sure the texture was a little off (I fixed the proportions in the recipe below so you can make amazing, sanely proportional P.C.W.C. Brownies), but they tasted pretty good. 

I'm very critical of my baking, but just to paint you a picture of how good these are my mom kept RAVING about these. 
I mean RAVING.
This is the same mom who rolls her eyes every time I tell her I'm going to "veer" from a recipe.
The same mom who looks at me with the perfect amount of disapproval and acceptance of the fact that I'm an adult, when I come home with a huge bag of Hot Cheetos, Animal Cookies, and Thai Bubble Tea and tell her I'm going to go watch a movie.

Ya, that mom.
That mom ate half the batch.
And that's gracious estimating right there.
Pumpkin Cheesecake White Chocolate Brownies (or P.C.W.C.B for short)
adapted from  Nook and Pantry

White Chocolate Brownie Base
  • 1/2 Cup of Butter
  • 5oz. of White Chocolate Chips (Use Nestle)
  • 2 Eggs
  • 5 Tbsp Sugar
  • 1 tsp Vanilla
  • 3/4 Cup of Flour
  • 1/2 tsp of Baking Powder
  • 1/4 tsp of Salt

Pumpkin Cheesecake Top
  • 8oz of Cream Cheese (Use the Block Type)
  • 2/3 Cup of Sugar
  • 1 1/2 tsp of Vanilla
  • 1 Egg, plus one yolk
  • 2/3 Cup Canned Pumpkin Puree

Preheat oven to 325F
Makes approx. 15 good sized brownie/bars
 Brownies:
1) Measure out 5oz of white chocolate chips.  You can also use chopped white chocolate if you'd like.
    I bought Ghirardelli, but I was pretty disappointed in the texture.  I've only ever eaten Nestle White
    Chocolate before.  Of course, I figured Ghirardelli would be the best of the best, but I won't be
    buying this brand again...at least in white chocolate chips.
 2) Get 1/2 cup (one stick) of butter and cut into small pieces to help it melt faster.
 3) Melt the white chocolate and butter in a double boiler, stirring frequently.  Take off heat when just
     completely melted.  (You can use a microwave instead.  Just start with 1 minute then continue
     with 15 second increments until just melted.  Stir well between each heating).
 4) In a medium sized bowl, beat eggs and sugar together.
 5) Beat until fluffy...almost "meringue" like.  Add white chocolate mixture.
6) In a sifter add flour, baking powder, and salt.  Sift over the wet ingredients, mixing occasionally in-
    between adds.
 7) Add vanilla.
 8) Put into a greased 8in x 11in pan (you can use the standard 9in x 13in pan, but just remember they
     will be thinner and will need to cook less).
 Cheesecake:
A) In a medium sized bowl, mix together cream cheese, sugar, and vanilla.  Beat until fluffy.
 B) Add eggs, mix well.
 C) Add pumpkin, beat until just combined.  Pour mixture on top of white chocolate brownie base.
     *Optional: Take a knife and "cut" criss-crosswise the brownie/cheesecake batter in the pan.  This
     will mix some of the elements together and create a "swirl" design on top.  However, because the
     white chocolate and pumpkin are both pale colors the distinction will be slight.  Also if you don't do
     this, the brownie part will be more of a crust instead of a sort of "mixture."  Either way works.  I cut
     mine across a few times, but it didn't work too well as you can tell by the two layers clearly shown    
     in the pictures.
  D) Bake in oven at 325F for about 35 minutes or until cheesecake top is set.  You can test this by
       inserting a toothpick two inches from the edge.  It should come out relatively clean, with no wet
       batter.

[Cue music]
Drea-ea-ea-ea-eam, dream, dream, dream
I love you so and that is why
Whenever I want you, all I have to do is
Drea-ea-ea-ea-eam, dream, dream, dream


Thursday, November 1, 2012

Pumpkin Truffles (★ ★ ★ ☆ ☆)

Last night I learned a life lesson. 

Sometimes things don't turn out as planned.  

And you just have to let go.

Okay, so I've already had to learn this lesson.  Hello!...I've been alive for 25 years.  That's at 10,000+ opportunities for plans to go awry. 

But last night, I learned the other part of that lesson.  

The part that is: Sometimes things don't turn out as planned, and that can be beautiful.

These truffles proved this - not only in the figurative sense, but in the literal sense as well.

As in, they were literally more beautiful.  I had dark plans.  I was going to Zombify these bad boys.  We're talking bone sprinkles, green coating, eyeballs, and red food gel.  I had witty banter prepared to make you laugh and cry while craftily tying in not only Halloween, but also "The Walking Dead."  It was a Hallowinary (Halloween + Culinary) masterpiece.  

But alas, I am not a candy maker.  I should have learned and accepted this by now.  But Zombie truffles called to me and I have a knack for wanting to show anything up that dares to tell me "I can't."  Psht, oh really.  Wham bam. Schooled.  Burned.  I'm awesome.  Enjoy.   
So needless to say, these delicate confections you see before you were not at all what I had in mind. 

Of course, since it's Halloween I could still talk to you about zombies and the wonder that is "The Walking Dead," but I'm going to save it.  

Because these zombies are fantastically adorable.  

And I WILL succeed someday in making them for you. And on that day we will discuss apocalypse's  and "walkers."

But for now I'm just going to vent....
I obviously have a very high opinion of myself.  

Tell me how else do I always end up in these situations?

"Oh my gosh, this blogger made the most ridiculously amazing zombie truffles.  They're creative, have blood oozing out, and yet still somehow remain adorable...and they're perfectly shaped.  "Pin," please, cause I'm totally doing this!"

Ya, let's recap:

-So creative that they're disgusting and adorable at the same time.

-Perfectly shaped...as in she has mad skills.

Um, but I have magic culinary powers.  Sooooooo.... what's the problem again?

I was so confident in my abilities that I waited until the night before they needed to be somewhere to even attempt them. What's a trial run?  Don't need that!  I even got out all the decorations and put them in separate clear glass ramekins because, apparently, not only was this going to be like buttering toast, but I had also become Rachael Ray. 

Goopy, lumpy, messy.

That's what I came out with.

     ...after I realized that my truffles were in no way going to be firm enough to fashion in to spheres...
     ...and my dipping attempts turned into puddles of candy melts everywhere but on the truffles    
        themselves...
     ...when my mom decided to ask me if I needed help five minutes after she heard me "cussing up a 
        storm." (um, since when are guttural grumbles cussing?)  Convenient mom, very convenient...

I realized a new plan was in order.  A plan to embrace what these wanted to be.  

Which were simple "rustic" non-zombie truffles.  
They were screaming "sophisticate me, but in a non-perfect way."  
And I said, "You've got it.  That's the only way I know how."

Pumpkin Truffles
Adapted from Yummy Mummy Kitchen

2/3 Cup Gingersnap Cookies, ground into very fine crumbs
1/2 Cup Graham Crackers, ground into very fine crumbs
1/2 Cup Pumpkin Puree 
2 Tbsp Confectioner's Sugar
1/4 tsp of Cinnamon
1/4 tsp of Salt 
4 oz of Cream Cheese, softened from a block (don't use whipped)
2 cups of white chocolate, white coating, or white Candy Melts (coating is the easiest to work with but 
            the least flavorful...at my skill level I'd take ease over taste any day)

Makes approx. 24 truffles
2 hours chill time required

1) Set aside two large bowls.  In one, place about 4 graham cracker sheets and in the other about twenty 
    gingersnap cookies.  Crush into very fine pieces.  I used a meat tenderizer because the gingersnaps 
    were particularly hard.  The finer the pieces the smoother the filling of the truffles will be.  

 *Tip:  If you find it difficult to to get the crumbs fine enough and you don't want to dirty a huge food
   processor you can put the crumbs you've made into a coffee grinder.  It's quick, works well, and is an
   easy clean up.
 2) In a large bowl combine gingersnap crumbs, graham cracker crumbs, pumpkin puree, cream cheese,
     powdered sugar, cinnamon, and salt until well combined and smooth.
 3) Place mixture in the refrigerator and chill until firm - about 2 hours.
4) After pumpkin filling is thoroughly chilled, take large teaspoons full and roll into balls placing on a 
    baking sheet or plate lined with parchment paper or saran wrap.  Place in freezer until very firm 
    about 20 minutes. 
*Tip: Make sure to use a block of cream cheese, not the fluffy, softened kind in the plastic containers.   
  I used whipped cream cheese instead of the block.  I'm thinking this is why they didn't firm up enough 
  for me to roll...I kind of had to "plop."
 5) In a double boiler, melt white chocolate coating over medium heat.  Once melted, lower heat so the
    water below is just at a simmer.  
    You don't need a double boiler to do this, you can heat the bars in the microwave.  You'll just have
    to keep reheating periodically because this type of coating is designed to harden very quickly at room
    temperature.
*Tip:  Normally, I use Candy Melts (found at Michael's or Joanne's), but I found this coating at
  Safeway in the baking section and I was really happy with it.  It was much thinner than the Candy
  Melts or Real White Chocolate Chips, which means easier for dipping and better for eating.
*Tip:  Learn from my mistakes 1) Don't be afraid to melt all the coating you bought.  It's not wasteful.  
  The more you have for dipping the easier your job will be.  2) Make sure you have a deep enough 
  area to dip your truffles in.  I used a long skinny cup on top of my double boiler to help condense the 
  area.  It worked okay, but next time I would use a large ramekin.  Make sure it's wide enough to easily 
  dip, but also deep enough to cover the fillings completely in one dipping motion.
 *Tip: Buy these dipping tools!  They are life savers.  No sticking your fingers in the melted coating.
   No having to stab the spheres with a stick and leave a hole.  I got these for $3.50 at Michaels and
   with a 40% off coupon that's $1.40.  A kindergartener could afford these.  Don't be cheap!
6) So dipping the truffles is a lot of trial and error, but here's how it went for me.  
    -Make sure fillings are very chilled.  If they start warming up - stop - and rechill them.  
    -Place a ball on the dipping tool and in a swift motion dip, twirl, and pull up.  
    -Carefully tap the tool on the edge of the cup/bowl to remove excess coating.  Don't scrape the truffle   
     on the side or let any pieces fall in.  It makes the coating lumpy and it will never be the same.  A 
     little extra coating on one truffle is a lot better than having to remake the coating completely (like I 
     did - notice the change in cups).  
    -Place coated truffle on parchment paper.  
    -If need be, once the truffle has hardened (about 3 minutes - you can speed up the process by putting 
     them in the freezer) you can re-coat if the first layer was too thin or missed some spots.  
    -Sprinkle with left over cookie crumbs immediately before the outside layer begins to set.
7) After truffles have hardened you can remove any excess "feet" by carefully pressing a knife to the
    base of the truffles.  These should be fine at room temperature for a few hours, but if you are going to
    be saving some store in the fridge for up to a week or in the freezer for longer.

 I think Rachael Ray would approve.  "Yummo!"


This post was featured on:


Thursday, July 5, 2012

Mother's Circus Animal Cupcakes (★ ★ ☆ ☆ ☆)


Mother's Circus Animal Cookies -- Making Children Happy Since 1914.  

Sure we almost lost them a few years back, but the incessant crying of babies and toddlers...and, okay, me...were enough to ensure they weren't gone for long. 

I've been crazy fond of these cookies for pretty much forever.  I vividly remember being at my great-grandma's house and plopping down on the ground with my little bowl full of pink and white and using the seat of her large recliner as a makeshift table.  I would savor each at a time - biting off a head here, scraping off some sprinkles there.

I mean, come on. A pink cookie, shaped like an elephant, covered in multicolored sprinkles?!?!  How is that not a four-year-old girls dream come true?! 
To this day these are some of my favorite cookies.  I don't know what it is.  They do taste good, and, honestly, the sprinkles are pretty enticing, but I can't help but wonder if it wasn't these early experiences that began the brainwashing while I was but a wee lass.

Thankfully, my best friend feels the same way.  For all the opposite that we are, we are surprisingly similar in the areas that count.  Don't judge.  So what if this is a biggie?  We once bought a tub of "limited edition" circus animal ice cream that turned out to be less than ideal (sugar cookie/cotton candy flavored ice cream?  no thank you!).  But together we scoured the entire tub for each and every last cookie bite.  That's teamwork.

Kinda solves the mystery of this post for ya, huh?  
Mother's Circus Animal Cupcakes

For Cake:
1 Box Strawberry Cake Mix
1 Bag Mother's Circus Animal Cookies (trust me, don't go generic. worst. mistake. ever.)
1 Small Box Vanilla Pudding
24 Cupcake Liners

For Frosting:
1/2 Stick of Butter
4 oz Cream Cheese
1 Cup Confectioner's Sugar
2 Tsp Vanilla Extract
Multi-Colored Non-pareils

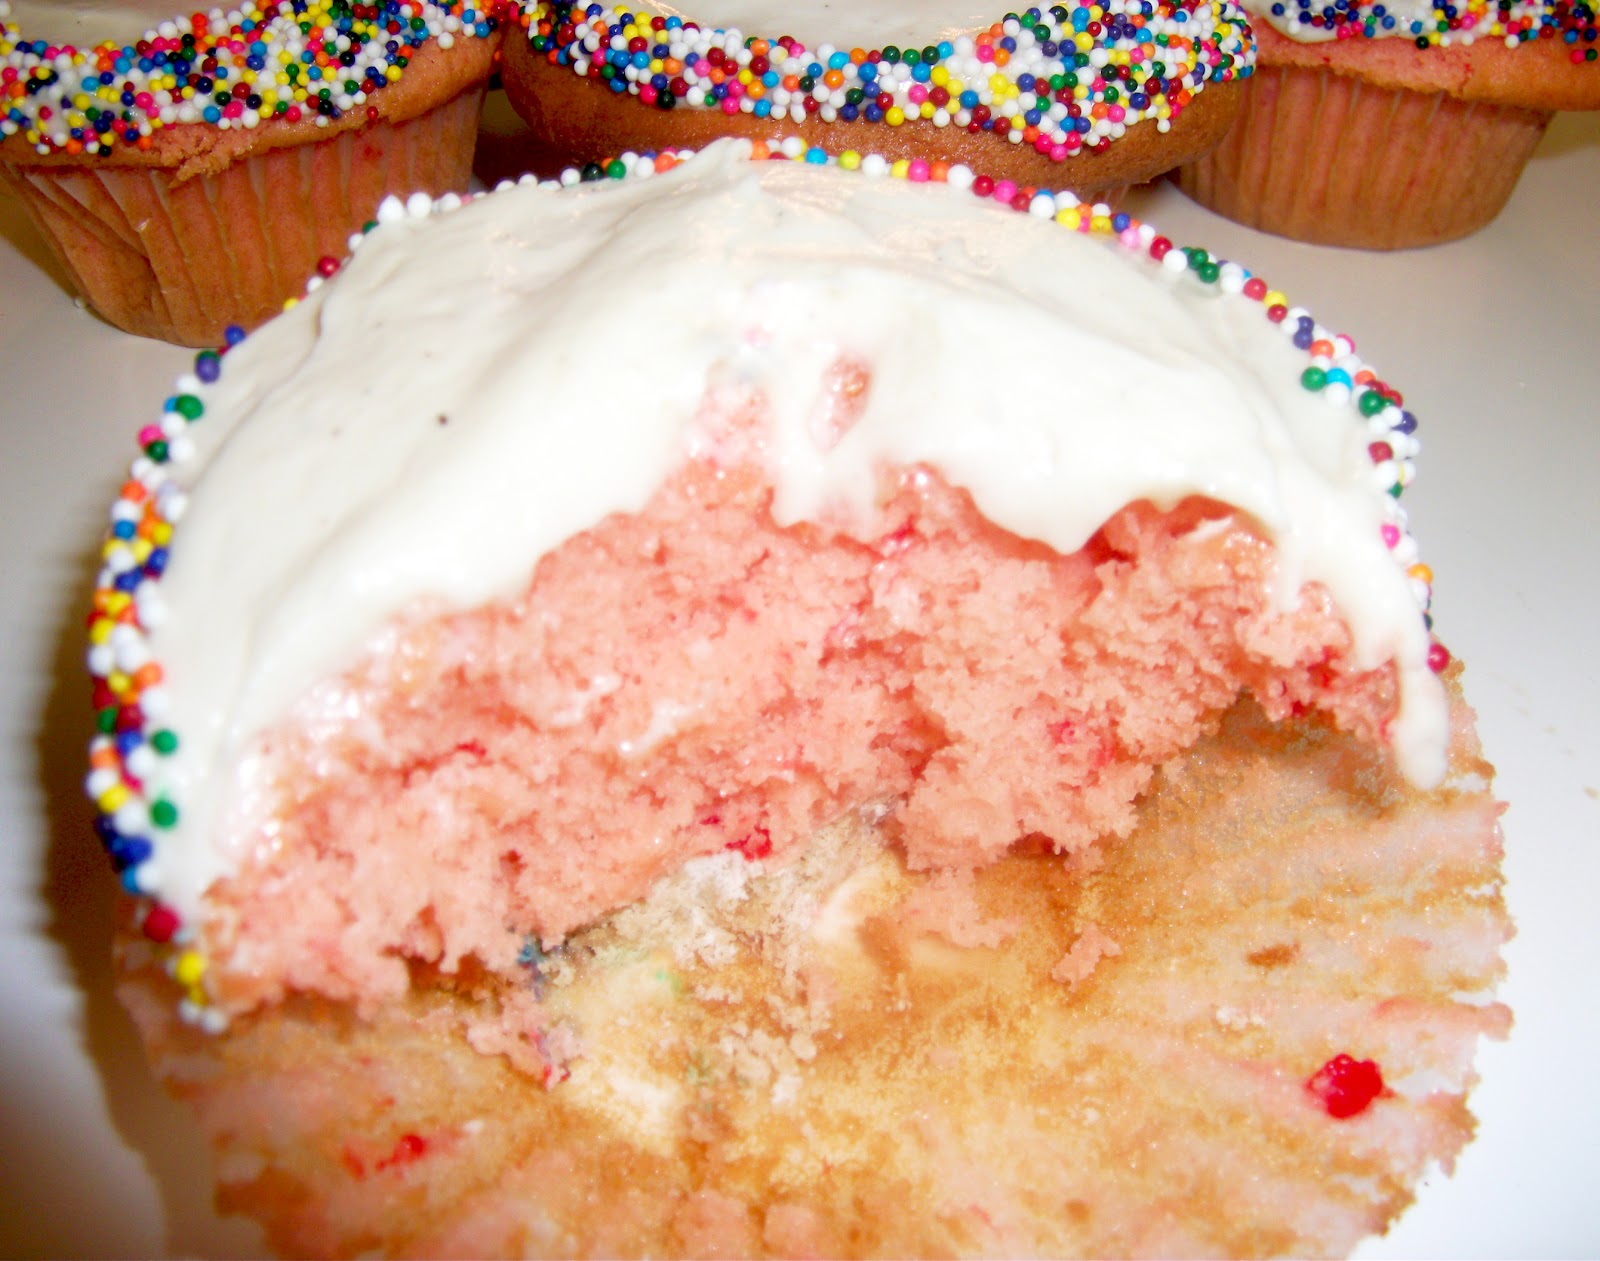
1) Prepare cake mix according to box adding small package of vanilla pudding.  2) In baking cups place a white circus cookie sprinkle side down.  Add batter and cook according to directions.  3) While cupcakes are baking prepare frosting. Cream room temperature butter on medium speed for a minute.  4) Add cream cheese and vanilla.  Mix thoroughly.  5) Add confectioner's sugar beating on lowest setting until dry ingredients are coated.  Increase to medium speed for one minute.  6) After cupcakes have cooled and are frosted pour non-pareils onto a plate.  Carefully roll the edges of each cake into the sprinkles.  Top with a pink animal cookie.  
These came out so cute!  But I wasn't too fond of the strawberry flavor of the box mix.

In fact, I hated it.  It tasted like Trix cereral.  You know, the kind with the rabbit that just wanted to eat a colorful bowl of cereal and none of those bratty kids would ever let him have any?  Where were their parents??  They fail at life.  

But back to the issue at hand -- Trix flavored cupcakes.  I don't like fruity cereal.  It's awful.  Sticky,  sweet, fake, fake, fakeness.   So you can imagine my utter disappointment at this discovery.  

If you are wanting to make a few of these on your own, I'd recommend a little recipe revamp:

Mother's Circus Animal Cupcakes - Take 2

For Cake:
1 Box Funfetti Cake Mix
1 Bag Mother's Circus Animal Cookies
1 Small Box Vanilla Pudding
24 Cupcake Liners

For Frosting:
1/2 Stick of Butter
4 oz Cream Cheese
1 Cup Confectioner's Sugar
2 Tsp Vanilla Extract
3-5 Drops of Red Food Coloring
Multi-Colored Non-pareils

Prepare as above except: 1) Pink cookie on bottom (the white get a little darkened in the oven) and the white cookie on top.  2) Add some red food coloring to frosting to make pink. Actually, a fluffier frosting recipe would be even better.  As much as I enjoy the subtle sweetness of a cream cheese frosting it is a bit more goopy than I would've cared for in this situation. 


Although, I have to say nothing entices little children like a pink cupcake.  I took these to an event and they were gone before I could blink.  Imagine my surprise...or not...at the sight of little girls in frilly dresses all across the room holding my pink confections.  

Thank you pip-squeaks for eating Trix disguised as animal cookies.  Joke's on you.   Not that they cared.  A sugar bomb is a sugar bomb, right?

I figure if you actually read this whole thing, then it's safe to assume you love Mother's Circus Animal Cookies as much as I do.

So then, in theory, you might appreciate this little tidbit from one of my favorite baking blogs - The Domestic Rebel.  She recently conducted a circus animal themed baking week.  How legit is that?!?

For your enticement:
Circus Animal Cookie Rice Krispy Treats - Domestic Rebel
Circus Animal Cookie Pie - Domestic Rebel
Circus Animal Cookie Ice Cream - Domestic Rebel
Circus Animal Cookie Truffles - Domestic Rebel
Circus Animal Cookie Mini Cheesecakes - Domestic Rebel


Thursday, June 14, 2012

Fastest Easiest Ever: Citrus Cupcakes (★ ★ ★ ☆ ☆)


So just for arguments sake, say you were taking a night course.  Every Wednesday for twelve weeks you attended said class.  And in return for giving up your valuable evening hours, you got to know your classmates pretty well -- mostly in part, because night classes are unpopular.  

I mean, who wants to spend their confection baking, gym fat-busting, dog fight hummingbird watching, [insert preferred activity here] spare time sitting on their tush in a darkened room for hours on end?

Well...me, I guess.  

And a select few others.  The cream of the crop...in my most humble opinion.  

Moving on...

If after spending the equivalent amount of time with these new found friends as you did in fifth grade at that crazy youth camp where you were forced to strap yourself to a rope and repel down a rock even though you didn't want to and were sure you were going to die...and after actually making it safely to the ground your counselor offered the most comforting words of "I told you so,"...you would agree that some sort of celebration involving food would be in order, right?  Right!?  

Then why, pray tell, did I find myself dumb-faced and gaped-jawed when no one wanted to shake things up for our final class.  Are people this lazy?  Or worse, have Californians become so healthy that they no longer eat for pleasure?  

No.  I refuse to make eating a job.

So even though I was out-voted, my baking/need-to-feed-people gene compelled me to bring something.  Someone in that room needed a cupcake.  And this could not go unrectified. 

The only problem was I had literally two hours to make something happen.

That's when I came up with these - Fastest Easiest Ever "Citrus Cupcakes."


What you need:
1 - Box Lemon Cake Mix
1 - Small Box Instant Lemon Pudding
1 - Can Cream Cheese Frosting
1 - Lime (for zest and slicing)
1-2 Tbsp Lime Juice (from a bottle or pick up an extra lime)

Step One:
Preheat oven.  Prepare cake mix, adding one package of lemon pudding (the "dry cake" savior).  Bake according to directions on box.


Step Two:
While cupcakes are baking, zest lime then slice into thin halves or quarters.  Add 1-2 Tbsp of lime juice to cream cheese frosting.  Do this to taste, adding a tbsp at a time.  I ended up adding about four tbsp and regretted it later...the flavor will sneak up on you!

Step Three:
Wait.  Rest.  Relax.  Sneak in a chapter or two of "Catching Fire" while you mull over the intricacies of the whole Gale/Peeta debate.  Gale for Katniss, Peeta for me.  At least...that's what I did.

Step Four:
After cupcakes have cooled, frost and top with lime slice and a sprinkle of zest.  Voila!

Literally took me an hour and a half from the first picture shot to lemony/lime goodness in my mouth. Can't beat that!


Eat your heart out California!


Thursday, May 17, 2012

Oreo Cheesecake Cupcakes (★ ★ ★ ★ ☆)


I'm not joking about this blog thing.  Yes, I stopped blogging for a while...took a siesta if you will - a long siesta.  But since I started blogging again, I forgot how much I love baking for people.  And having some left over for myself isn't so terrible either. 

So I've committed to baking consistently and I will be posting a new entry every Thursday.  It may not always be about something I baked, but it will be about something sweet.  I might do a food review or recommend something I've come across that I feel all my baking loving readers should know about.  Who knows?  The possibilities are endless.  

This entry marks the beginning of my current baking adventures.  All I had posted about before, were old entries that I had just never gotten around to publishing.  Enjoy!
--


Pinterest is an interesting beast.  Yes, I chose that word deliberately.  Here is the process:

1) Hear about it from a friend.  
What is it?  
It's this site where you post pictures you find online.
Sounds....interesting.  I mean I like pictures. 

2) Must apply for an invitation.
What is this!?  An invitation?  It's a place to stick pictures.  Seriously, what's the big deal?

3) Acceptance!
Sweet victory!  I'm in!  Okay, let's see if I can figure this thing out.

The next thing you know, you're in bed and it's an hour after you were supposed to be asleep.  You've already spent a good three hours "pinning" pictures, but there is a world of images you have yet to discover and share with your devout "followers."

Ya, that's pretty much how it goes down.  BUT there is one good...no...wonderful aspect of Pinterest. It's the "recipes."  There are so many delicious things to see.  
-Things I would have never thought of on my own.  
-Things my friends would have never thought of on their own.  
-Things that even my grandparents wouldn't know to pass down from generation to generation.  

It is literally the best collection of recipe ideas I've ever come across.  And that is where I found this little gem: Oreo Cheesecake Cupcakes

These individual cheesecakes were SO easy to make and delicious!

For the crust, you plop one single Oreo into the base of a cupcake liner.  Seriously...that's it.

Cream cheese batter prepared...awaiting the Oreo crumble. 

The cheesecake batter ready for the oven. 

Killing time.  My hair has gotten so long that a simple "put my hair in a low pony for baking purposes" doesn't cut it anymore.  A more glorious bun adorns my head now.  

Fresh out of the oven, the tops should be slightly puffed up.   As they cool, they will flatten.  

I didn't want to leave the tops bare so I melted some chocolate chips, cut the tip off of a Ziploc bag and went to town. 


Viola!  Sooooooo good. 


Even Archie, my cat, approves:
This is the face he makes when he smells something so good it overwhelms his senses. :)


I'll admit.  For this one, I had a slight ulterior motive.  It was my friend's birthday and he loves cheesecake.  

So I syphoned off a few specifically for him...

If you like cheesecake and easy recipes.   Look no further.  This one is for you.

Check back next Thursday for a new entry!