Showing posts with label bar. Show all posts

Thursday, April 4, 2013

Pecan Bars (★ ★ ★ ★ ★)

I think I owe someone an apology.

Yes, it's Martha Stewart.

Did you think this was about my mysterious absence the past two weeks?

Well, it's not.

But I am truly sorry about that too.

I love posting.  And posting on time.  On schedule.

I'm an extremely organized perfectionist.  If I am too busy or too tired or the sun is too beautiful and is calling me to the outdoors, it kills me not to post.  But sometimes you have to live life, and if that means I need an extra nap or to get two shades darker by Sunday then I have to take a deep breath and just let it happen.

Apparently, I haven't had too rough of a time doing that as of late.  So I guess I'm cured there.
Hallelujah!
Back to Martha.

Ah, yes.  Martha.  We've had a rocky past.  I mean, I ripped her up pretty good when I posted about these Chewy Orange Almond Cookies.

Although, I have to admit.
She kinda deserved it.
They were grah-oh-sssss (gross :).

But then something happened.
Something too wonderful for words.

These pecan bars came my way.  And oh. ah my. ah goodness.  They are absolutely divine!!

Five stars guys.
I gave these 5 Stars.
That's how serious I am about them.

Kinda gooey, slightly crispy, crumbly, pecan-buttery goodness.  These are the kind of cookie bars you have to pawn off to your friends.

Because they are so good, you will eat the whole pan.
And then you'll get fat...
Because of all the butter,
Duh!
So pawn them off to your friends so you can all get the same amount of fat together and still enjoy this incredible life-altering gift from Martha.

My once-enemy.
I'm usually a pretty good judge of character.

I feel like it's one of my stronger attributes.  But I guess I'm going to have to humbly eat my words here.

Hey, I said was was "pretty good" - not perfect!

I stumbled upon this recipe when my mom baked these around Thanksgiving.  She had gotten the recipe from a friend and was ranting and raving about how good they were.  Okay, mom.  Exaggerate much?

But one bite.  One bite.
That's all it took.
Twitterpation - to the nth degree.

So what a, small - yet effective, slap in the face when I realized where these had originally come from -Martha Stewart herself.  The Queen.  The Legend.

WhaAaAa?!
*Choke*...
This can't be?!

Oh, but it was.  It. Was. 

And you know what? I'm okay with that now.
Because becoming friends with your once-enemy, creates stronger bonds than any other friendships I know of.

So how do you make up for a past public-bash of your new found friend?
With a now present-love letter, of course!
Dear Martha,

Rants are so much easier to write.  I get to be witty and funny.  And at someone else's expense.

Love letters are usually so cheesy and not funny at all.  Plus the only person who stands to be exposed is the lover not the lovee.

See the more I think about it, the more I realize I'm not going to be too good at this whole blog-love-letter thing, so I'll just cut to the chase.

Your Almond Cookies were terrible,
Seriously they were bad.
But your Pecan Bars incomparable,
I mean there was is drool.

So let's just make amends,
And resign to be great friends.

Even though you were the one who first put us in this mess,
I am not above forgiveness.

Love Your BFF,

Nat

Pecan Bars
from Martha Stewart

For Cookie Crust
  • 18 Tbsp of Butter (2 sticks, plus 2 Tbsp)
  • 3/4 Cup Brown Sugar, Packed
  • 3 Cups of Flour

For Caramel Pecan Layer
  • 8 Tbsp of Butter (1 stick)
  • 1/2 Cup of Brown Sugar, Packed
  • 6 Tbsp of Honey
  • 2 Tbsp of Granulated Sugar
  • 2 Tbsp of Heavy Cream
  • 2 Cups of Pecan Halves
  • 1/2 tsp Vanilla Extract

Makes about 24 pieces
Need one 9x13in Pan
**Cooling Time Required Between Some Steps 
1) In a medium sized bowl, mix together 18 Tbsp of butter and 3/4 cup of brown sugar.  Beat on 
    medium speed for 2 minutes, until fluffy. 
2) Add flour to the mixture, 1 cup at a time.  Combine well after each addition. 
3) Dough is done when all ingredients are dissolved together and large clumps form. 
4) Press dough into the bottom of a 9x13in pan.  Make sure no clumps are remaining. 


5) Prick the crust with a fork so there are indentations all across the top.  Chill pan and dough in the 
    fridge until firm, approx 20 minutes. 
6) Place pan in preheated oven at 375F degrees for 18-20 minutes.  Cookie crust should be golden. 

7) Cool crust completely before completing next steps.
8) Reduce oven temperature to 325F degrees.  In a medium saucepan, melt 8 Tbsp of butter, 1/2 Cup
    brown sugar, honey, granulated sugar, and heavy cream over high heat.  While stirring constantly,
    bring to a boil. Cook for another minute or so until mixture coats the back of the spoon.
9) Remove pan from heat.  Stir in pecans and vanilla.
10) Pour caramelized layer on to the cooled cookie crust.  Bake in oven until caramel top begins to
      bubble, approx. 15-20 minutes.  Cool completely before cutting.

This is definitely the beginning of a beautiful friendship. 


Thursday, December 6, 2012

Gingersnap Magic Cookie Bars (★ ★ ★ ★ ☆)


Why don't you go ahead and settle in, grab your morning coffee,  because I want to tell you a little story.

A little story called "Why My House Isn't Safe For Magic Cookie Bars: Or Anything With Copious Amounts of Sugar."

So the title's a little excessive.
But it's my story.
And I think it's perfect.

I honestly contemplated changing the names in this because my family might kill me, but where's the fun in that?

Plus, after reading about Person 1, Person 2, Person 1 again, then Person 3...you're just going to get all confusl'd.

So since I'm going there, let's just lay it all out right now.

Mom,
          Dad,
                  Bestie

Prepare to be famous.

Brother - You are safe.  You don't like coconut.
So I'm baking Monday night, pretty much the usj.

Nothing too interesting there.  Except that everyone was home.  [Dun, dun, dun, duuuuuuuuun].
I'm used to having the house to myself on baking nights.  Just me, an iPod, and an electric mixer.

See when you are alone there are baking pros and cons.

The Cons.

  • You are lonely

That's it.

The Pros.

  • You are lonely so you can focus and do your best baking.
  • You are lonely so you get to listen to your music as loud as you want (and dance around while belting out Mariah Carey Christmas songs into a wooden spoon.  Not that I do that...just the "option" is there).
  • You are alone so you can tweak any recipe to your heart's content.
  • You are alone so you can taste test something fresh from the oven without swarms of "sugar deprived" eyes glaring back at you.  

Three hungry people, one blogger.
There's bound to be conflicts of interest.

Bloggers have a different mindset.
We don't bake to eat.
Well, ultimately we do, but not before our desserts have paid their dues.
Prepping, styling, photo shoots, etc.

Much to the chagrin of my family members.

---

So back to the story.  I take the bars from the oven.  Not two minutes after I settle down to watch a Christmas movie, do I hear the terrifying sound of a knife slicing into melted chocolate and toasted coconut shreds.

Bakers can totally hear that kind of stuff. 

Now, I'm not against sharing.  I understand I have infused the house with an irresistable aroma. But I worked hard on those cookie bars.  The idea.  The shopping.  The baking.  The documenting.  After all is said and done every post costs me about 8 hours of free time...so I'm none too thrilled by the sound of my hard work about to be mutilated at the hand of someone other than me.

Me: "Nope." 
Dad: "You serious?"
Me: "Yep."
Dad: [Insert crazy pout.  Like I just told him I think going to college is a waste of time.]

Sure he's my dad.  He's only sacrificed everything for me.  But I still like to have the final say in what happens to my baked goods...and when.  Call it my controlling "vice," but I'm not ready to give it up. 

Twenty minutes later, after the cookie bars had cooled the "proper" amount of time, it was time to slice and share.  But only a taste, because these babies still had work to do.

Mom and Bestie were beside themselves and promptly consumed their share.
But Dad, nope.  He was good.  The moment had past.  
On his terms, or no terms.  Like Father, Like Daughter.  

Suddenly, an even bigger dilemma than I could have ever predicted arose - There was one piece and two willing participants.  

I mean the obvious, reasonable thing to do would be to share, right?
And that's what happened.

Until my Mom convinced Bestie to refrigerate the "precious" morsel because it would "taste better."  I walked into this:

Mom: "I'm so sorry.  I ate the whole piece.  I couldn't stop myself."
Bestie: [Insert Stunned Silence.  Cue welling of tears.]
Mom: "When Natalie goes to bed, I'll cut you another one."
Bestie: "Wait.  You really ate the whole thing?"
ME: "Excuuuse me?"
Mom: "No, I'm just kidding. I only moved it to the door."
Bestie: [Insert pent up chuckle].
ME: "...Uh, what was that about me going to sleep?"  

No joke, totally had a nightmare that I woke up to find 4 measly pieces.
Me: "What the heck happened?!"
Mom: "I'm so sorry.  They were just so good!"
Me: "I still had to take pictures!!"

I breathed a sigh of relief when I found the pan safe and sound, pristinely wrapped on the counter in the morning.  But did that stop me from hiding that dish in the tupperware cupboard?  

No.  
No, it did not.  
Gingersnap Magic Cookie Bars
adapted from Love from the Oven

1 Stick of Butter (1/2 Cup)
1 1/2 Cup Gingersnap Crumbs
1 - 14 oz. Can Sweetened Condensed Milk
2 Cups Nestle Holiday Chips (or 1 Cup Semi-Sweet and 1 Cup White)
1 Cup Chopped Walnuts (Pecans work well too)
1 1/3 Cup Flaked Coconut

Needed: 9 x 13in Pan
Preheat Oven to 325F Degrees
Cook for 25-35 Min
Makes Approx. 24 Bars

1) Crush gingersnaps into fine crumbs.  I used a meat tenderizer and a coffee grinder to finish up the 
    job.
2) Preheat oven to 325F Degrees.  Place cube of butter in 9 x 13in pan and place in oven to melt while 
    preheating.  Check every few minutes to make sure it is melting and not getting burned.
3) In the meantime, chop up a cup of nuts.
*Suggestion: I LOVE crust.  And I found this recipe to be a little on the thinner side.  What I would 
                      do next time is increase the butter to 1 1/2 cubes and double the cookie crumbs.  Or do 
                      1 Cup Gingersnaps, 1 Cup Graham Crackers.  Grahams are a lot sweeter and less spicy.  
4) Once butter is melted, remove from oven and place on heat safe surface.  Sprinkle cookie crumbs 
    evenly over the butter and gently pat down with the back of a spoon.  Make sure the entire bottom 
    surface is covered.
5) Pour can of condensed milk over the crust layer.
6) Next add 3/4 Cup Nuts, and 1 1/2 Cup Chocolate Chips (saving some for the very top layer).
7) Sprinkle the coconut evenly over the nuts and chocolate.  Pat down gently.
8) Top with remaining nuts and chocolate chips.
*Suggestion: I've made these before and "pre" toasted the coconut.  I wish I had done that this time.  I 
                       love the toasty smell and taste of the coconut after it's been baked for awhile. If you want 
                       to pre-toast the coconut, line a baking sheet with foil and spread the coconut thinly 
                       across.  At 350F, bake for no more than 5 mins.  Watch carefully that these do not burn.  
                       You want to see the edges of the flakes just beginning to darken. 
9) Bake for 25-35 minutes.  Top should be slightly browned.  Remove from oven and place on cooling 
    rack.  Allow to cool completely before cutting and serving. 
Do not think me cruel. After these pictures, my family had their fill.  
All Tuesday night, they ate to their hearts content.
Then came Wednesday. And I brought the rest to work.
So Bestie cried.  

Oh geeze. 


Thursday, November 8, 2012

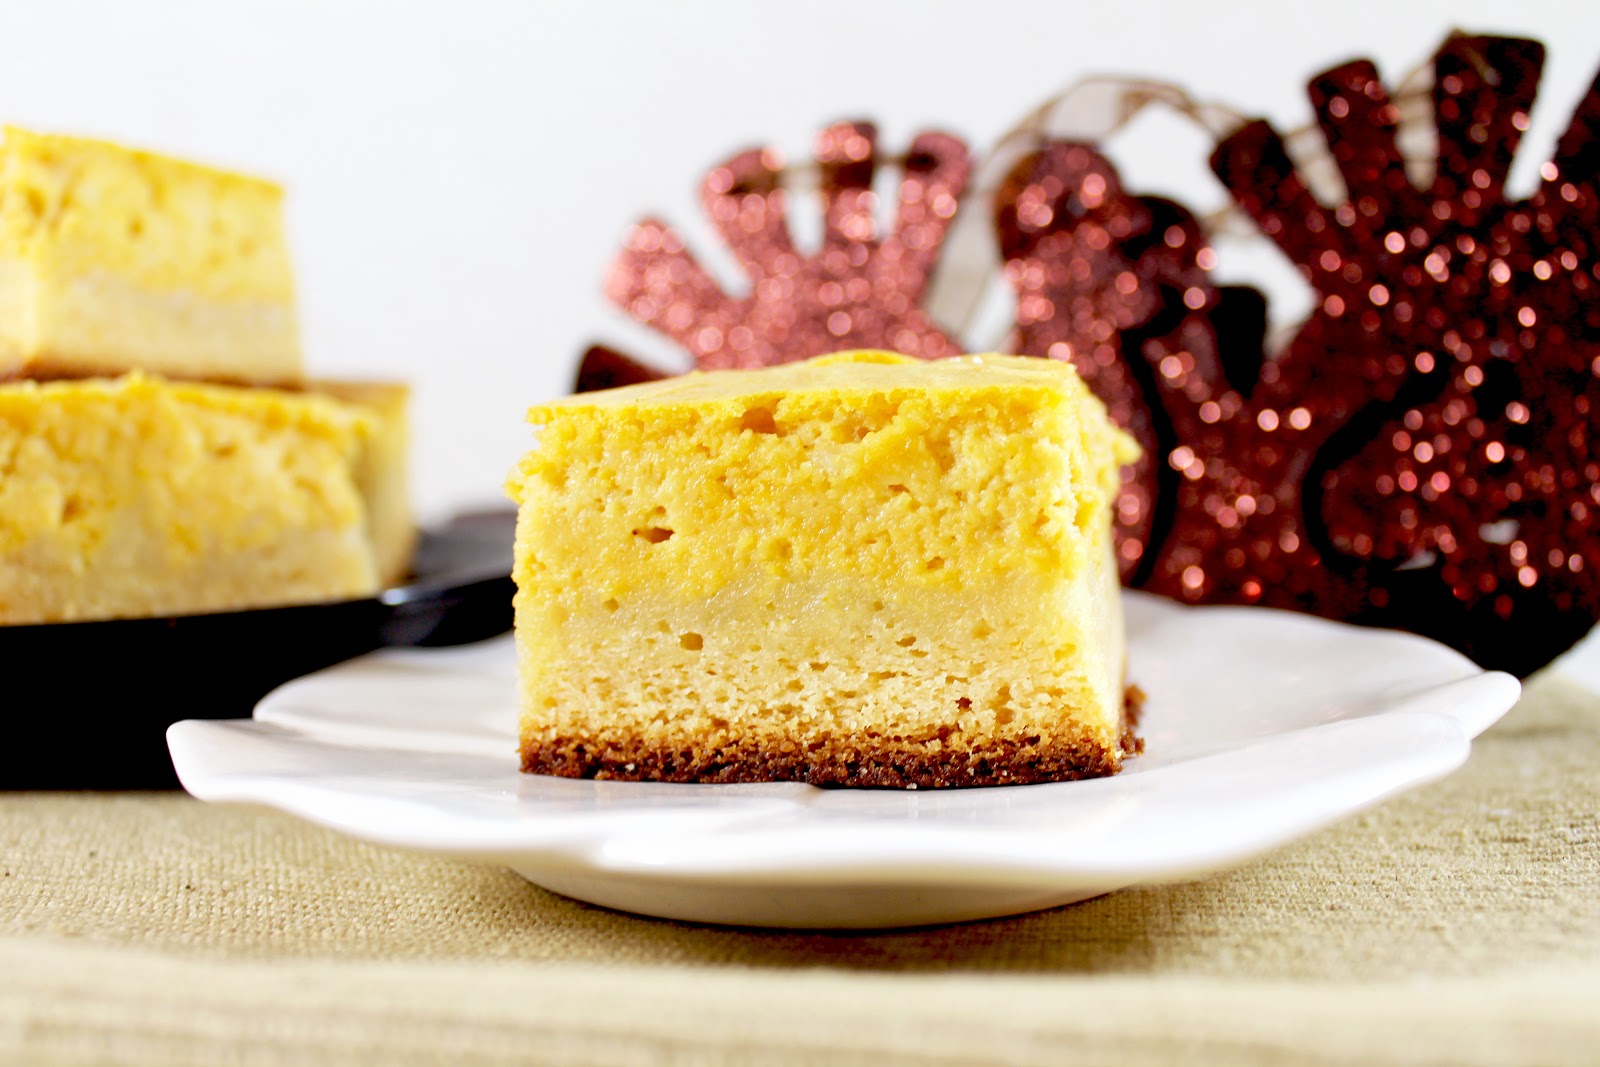
Pumpkin Cheesecake White Chocolate Brownies (★ ★ ★ ☆ ☆)

"Hey, uh, did you know your title is a mouthful?"
Um, ya, I did.  Sorry about that.
"Oh, oh no problem.  But it's just really long...borderline tongue twister.  My two year old couldn't even repeat it back to me."
...uh ...  Sorry?  ...mm ...  You probably shouldn't be feeding these to your two year old.  Maybe start with something more simple - like cheerios ... -and counting to 5?

Yes, readers.  That WAS random. 

But so was how this "thing" (bar...brownie...whatever you want to call it) happened.

I made these the same day as my Pumpkin Truffles.  I was, honestly, just trying to get rid of the rest of the canned pumpkin I had and this is what happened.

It was like the "Attack of the Living Baked Goods" night in my kitchen. 

-----

I have to back track a little bit.

October was the month of the pumpkin.
Pumpkin patches, pumpkin carving, pumpkin ice cream, pumpkin donuts, even pumpkin cereal.

Now don't get me wrong, I'm as "over the moon" excited as the next guy about Pumpkin Spice Lattes at Starbucks...but those are in September. When the novelty hasn't worn off.

In September, blog posts like this seem fun, light-hearted and fresh. (Okay it still kind of excites me...but that's beside the point!).

I became the Pumpkin Grinch.

I follow a lot of baking blogs and every one, every day was offering me some other shade of pumpkin.
Muffins, ganache, whipped cream, butter, foot scrubs, and toothpaste were presented to me on a big fat pumpkin platter.

And like all things, it seems good at first...
Oh yeah!  Ideas for fall baking!
But eventually we reach that "special" point.  The one I like to call "overboard."
Suddenly, what once used to bring me joy, now was just plain annoying. 

I was annoyed at having to see the same color food every day.
Annoyed that I had to think about pumpkin in ways I'd rather not - pumpkin seed guacamole??
But mostly I was annoyed that everyone had caught the pumpkin train, but me.  The market had been saturated.  Closed. Full.  Done.    

Okay, I was bitter and jealous!

I couldn't stand another pumpkin recipe, so I grumpily swore I would find "other" more "interesting" things to bake.  

But who am I kidding?  

It's November.  It's fall.  Thanksgiving is near.  
Now's the time we all start dreaming in pumpkin Technicolor.  

My intention was to only do one pumpkin recipe - because I had self-control - but like I told you, my kitchen had a mind of its own.  
The truffles took all of a measly third of a can of pumpkin. 
What on earth was I going to do with the rest?

Being a regular baker, I:
1) Hate wasting things I spent money on and
2) Enjoy double backing my baking efforts. (Bake two similar things in one night means no more baking for the week!)

After the whole truffle "ordeal," I wanted to make something that was drastically easier and a little more my forte - enter the brownie/bar.

I suddenly had visions of pumpkin cream cheese swirl atop a fudgey brownie.  But not a chocolate brownie...oh no - been there - done that.  Pumpkin and chocolate do NOT mix.  Don't argue with me, it's a fact. 

Sure that pumpkin pancake with chocolate chips tasted fine, but how many chocolate chips were in there?  5?  Ya, you act like it's chocolate and pumpkin, but it's really not.  That's the kind of thing you do to your cat when he needs to take medicine.  I'll just crunch a little in his food.  Mix in a couple treats and voila!  Medicine that no longer resembles medicine!

Enter: White chocolate.
Oh that glorious, fatty, un-chocolatey chocolate.
That would go stupendously with pumpkin!

I tore through my pinterest page, and found the white chocolate brownies I had been dying to try.
The stage was set.
But my own eagerness got in the way.

In my attempt to finish off the entire can of pumpkin, I doubled the cream cheese recipe thinking nothing of it.  I'll just have to cook it a little longer.  Sound familiar? (Cake in A Jar, anyone?)

Of course, this is not so. I had to cook them so long that the bottom got a little too brown and the top never quite set all the way. 

But for once, my own independence did not fail me.  Sure the texture was a little off (I fixed the proportions in the recipe below so you can make amazing, sanely proportional P.C.W.C. Brownies), but they tasted pretty good. 

I'm very critical of my baking, but just to paint you a picture of how good these are my mom kept RAVING about these. 
I mean RAVING.
This is the same mom who rolls her eyes every time I tell her I'm going to "veer" from a recipe.
The same mom who looks at me with the perfect amount of disapproval and acceptance of the fact that I'm an adult, when I come home with a huge bag of Hot Cheetos, Animal Cookies, and Thai Bubble Tea and tell her I'm going to go watch a movie.

Ya, that mom.
That mom ate half the batch.
And that's gracious estimating right there.
Pumpkin Cheesecake White Chocolate Brownies (or P.C.W.C.B for short)
adapted from  Nook and Pantry

White Chocolate Brownie Base
  • 1/2 Cup of Butter
  • 5oz. of White Chocolate Chips (Use Nestle)
  • 2 Eggs
  • 5 Tbsp Sugar
  • 1 tsp Vanilla
  • 3/4 Cup of Flour
  • 1/2 tsp of Baking Powder
  • 1/4 tsp of Salt

Pumpkin Cheesecake Top
  • 8oz of Cream Cheese (Use the Block Type)
  • 2/3 Cup of Sugar
  • 1 1/2 tsp of Vanilla
  • 1 Egg, plus one yolk
  • 2/3 Cup Canned Pumpkin Puree

Preheat oven to 325F
Makes approx. 15 good sized brownie/bars
 Brownies:
1) Measure out 5oz of white chocolate chips.  You can also use chopped white chocolate if you'd like.
    I bought Ghirardelli, but I was pretty disappointed in the texture.  I've only ever eaten Nestle White
    Chocolate before.  Of course, I figured Ghirardelli would be the best of the best, but I won't be
    buying this brand again...at least in white chocolate chips.
 2) Get 1/2 cup (one stick) of butter and cut into small pieces to help it melt faster.
 3) Melt the white chocolate and butter in a double boiler, stirring frequently.  Take off heat when just
     completely melted.  (You can use a microwave instead.  Just start with 1 minute then continue
     with 15 second increments until just melted.  Stir well between each heating).
 4) In a medium sized bowl, beat eggs and sugar together.
 5) Beat until fluffy...almost "meringue" like.  Add white chocolate mixture.
6) In a sifter add flour, baking powder, and salt.  Sift over the wet ingredients, mixing occasionally in-
    between adds.
 7) Add vanilla.
 8) Put into a greased 8in x 11in pan (you can use the standard 9in x 13in pan, but just remember they
     will be thinner and will need to cook less).
 Cheesecake:
A) In a medium sized bowl, mix together cream cheese, sugar, and vanilla.  Beat until fluffy.
 B) Add eggs, mix well.
 C) Add pumpkin, beat until just combined.  Pour mixture on top of white chocolate brownie base.
     *Optional: Take a knife and "cut" criss-crosswise the brownie/cheesecake batter in the pan.  This
     will mix some of the elements together and create a "swirl" design on top.  However, because the
     white chocolate and pumpkin are both pale colors the distinction will be slight.  Also if you don't do
     this, the brownie part will be more of a crust instead of a sort of "mixture."  Either way works.  I cut
     mine across a few times, but it didn't work too well as you can tell by the two layers clearly shown    
     in the pictures.
  D) Bake in oven at 325F for about 35 minutes or until cheesecake top is set.  You can test this by
       inserting a toothpick two inches from the edge.  It should come out relatively clean, with no wet
       batter.

[Cue music]
Drea-ea-ea-ea-eam, dream, dream, dream
I love you so and that is why
Whenever I want you, all I have to do is
Drea-ea-ea-ea-eam, dream, dream, dream


Friday, September 21, 2012

Food Review: Trader Joe's Extra Dark Chocolates (★ ★ ★ ☆ ☆)

The best part of vacations: (clockwise) PB S'more, Olive Oil Tasting, Magic Show, Largest Chocolate Covered Marshmallow Ever!, Ice Cream on the Lake

Well, today is my last day of vacation and, thus, the last day of Food Review Week.

It's okay.  Everybody together - aaaawwwwhhhhhh. :(

I know, I know.  

You'll still get your weekly Thursday dose though, so no need for the tears.

And since it's Friday...and everyone loves Friday...I thought I'd end on a happy note - chocolate.

Everybody together - yippee! hooray! this is the greatest day of my life!  
                                 (Okay who said that?  That is what we call an over-re-ac-tion).

Anywhoo, this may seem like a repeat of the famous Fair Trade 72% Dark Chocolate Review, but I assure you it is not.  

That was an out and out rave.

This is a compare and contrast.

See totally different!

So let's get down to the nitty gritty.  After finding the new chocolate bar love of my life at Trader Joe's, I was intrigued by all the other 70%-ish dark chocolate bars they offered.  

Not being able to bear the thought of "settling," I decided to take drastic measures.  

The mission: to try them all.  

A daunting task, but someone had to do it.  And once again, I did it for you.  

Geeze, I should get a medal or something.  You guys are so lucky to have me to do your dirty work.  

The Trader Joe's Players:
  • 72% Fair Trade Organic Belgian Dark Chocolate
  • 72% Cacao Dark Chocolate
  • 73% Super Dark Organic Chocolate
  • 72% Swiss Dark Chocolate
  ★ ★ ☆ 
2nd Place.  Let's get the known out of the way.  Delicious!  Wonderful!  Fantastic!  This is one of my top 5 favorite chocolate bars.  Flavors: Very Fruity.  Distinct notes of raspberry and apple.  And oh so smooth.
                                                                                --
  ☆ ☆ ☆ 
4th Place.  Maybe if I had tried this bar by itself I wouldn't have disliked it so much.  But compared to the others this was a huge step (or 20) down from the Fair Trade and Swiss bars.  I found this rather surprising considering the price difference was mere pennies and it carried the Trader Joe's label like every other bar I tested.  Flavors: Extremely bold. Coffee essence.
                                                                                 --
  ☆ ☆ ☆ 
3rd Place.  While a few steps up from the "red" bar, this was still difficult to enjoy after tasting my first and second place choices.  Maybe it's just a personal preference, but I like creamy and smooth, which this certainly was not. Flavors: Very earthy, dirt.  (No joke, I took a wine class. I know my flavor palate!) Hints of blueberry.  The texture was also unique - slightly chalky and grainy.  Not my first choice for a chocolate bar.
                                                                                  --
  ★ ★ ☆ 
1st Place.  Did I think I would be putting first place on anything other bar than the 72% Fair Trade?  Nope.  No way. How could I get so lucky as to score TWO mega awesome chocolate bars not only from the same store, but also the same generic brand?  Are you kidding me?!  This is crazy!  I think the Fair Trade is a better bar all around, but this Swiss bar knows my weaknesses.  Flavors: Hints of vanilla and custard.  Super creamy and completely smooth.  Way to win this girl over.  Plus it's gluten free and vegan...although, I'm guessing so are the rest of these bars.
                                                                                   --


Mission Accomplished.  

Exhaustion and the dwindling availability of abdominal real estate could not keep me down.
  
Seriously, guys.  Why are you still reading this when there are so many wonderful - and cheap - chocolate bars at your fingertips?

But before you go, a recap for all your shopping needs:

  • Fair Trade: Raspberry Smooth - Yum 
  • Red 72%: Bold - Yuck
  • Organic: Dirt - Yuck
  • Swiss: Vanilla Cream - Yum


Coming Soon:

I'm going to be introducing a new rating system starting next Thursday.  Each title will now feature a "star" rating from 1 to 5.  This way it will be easier to sort out the winners from the losers.  Courtesy of a suggestion from my dad.  See kids it pays to listen to your parents!

★     - Mayday, mayday.  Make this now or pay someone to do it if you are a baking hazard. 
    ☆  - Good stuff here.  Definitely worth a rebake. 
   ☆ ☆  - Your average crowd pleaser.  Most items will have this rating. 
  ☆ ☆ ☆ -  Problems abound whether with ease or taste.  Repartee will be abundant. 
★ ☆ ☆  ☆ -  The worst of the worst. I.E. Vegemite.  More wit. 


I will also be labeling each item with "1 Star" through "5 Star" key words so you can easily find what you need in my labels tab.  I also have a "Worth A Re-bake" label already in place that lists all my favs.

-----

Word Count: 742.  Sooooo, report length.  Eh, are you really surprised?